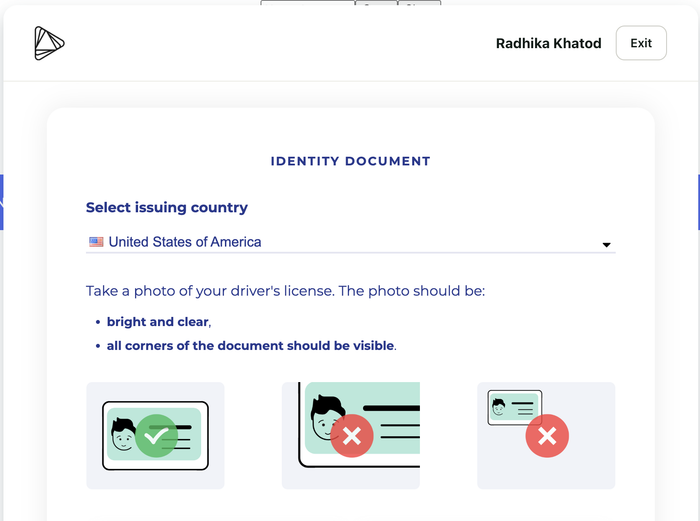
Configuring front end integrations for device tracking is hard but with the same singular SDK integration, clients now have access to document verification, phone centric verification, and device risk. Please reference Alloy’s API docs or reach out to your CSM help on setup.
The Alloy SDK now supports the SumSub document flow.
To get started, simply select "SumSub" as a plugin option in your workflow if you are already using the Alloy SDK. Dashboard setup instructions are here and API docs are here. Reach out to your CSM if you'd like to get it set up.
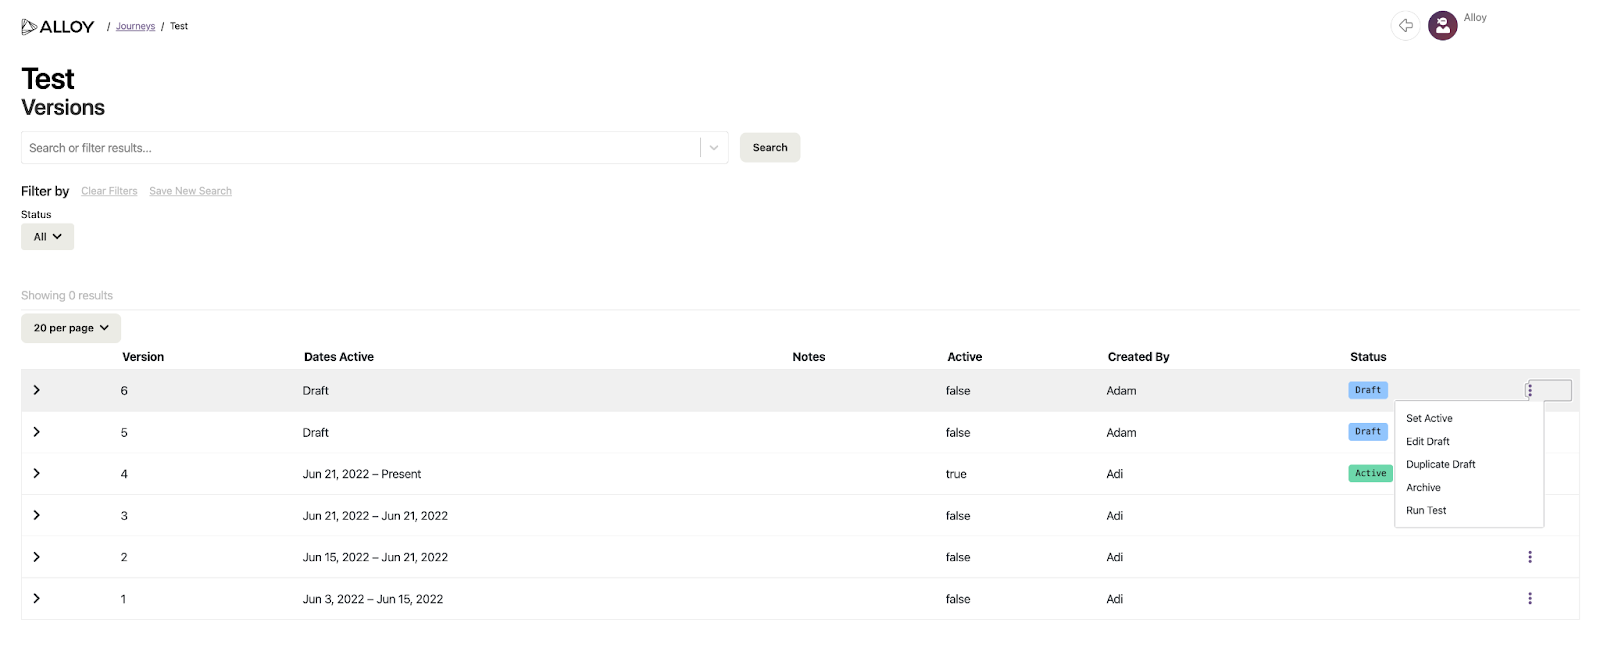
Clients using Journeys can now upload and test batch files directly within the Alloy dashboard. The file will be checked for any formatting or validation errors prior to running the test, and once complete, you’ll be able to view the results in the dashboard. This functionality is applicable for KYC and KYB use cases, including applications with multiple entities.
To get started, go to the Journeys page and click the vertical ellipses on the right of your chosen draft Journey, and select ‘Run Test’ which will open the Testing Suite.
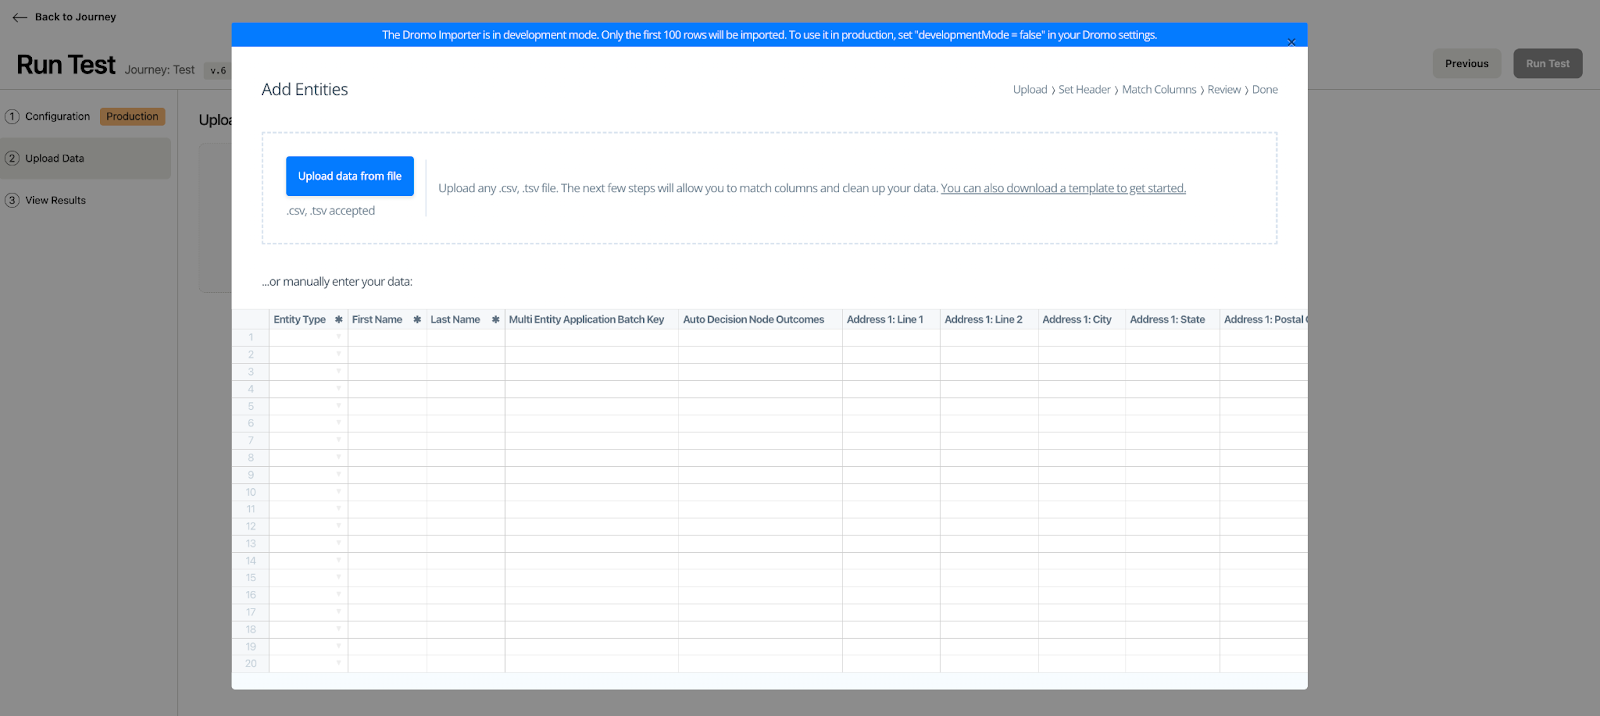
Once you’ve selected the environment you want to run your test in (Sandbox or Production), you’ll be prompted to upload your data.
You can either upload a file from your computer (or download our template) or manually input your data into the table. Our validation tool will test if the batch file you have prepared for upload is in the correct format and surface any errors for you to resolve before running the test.
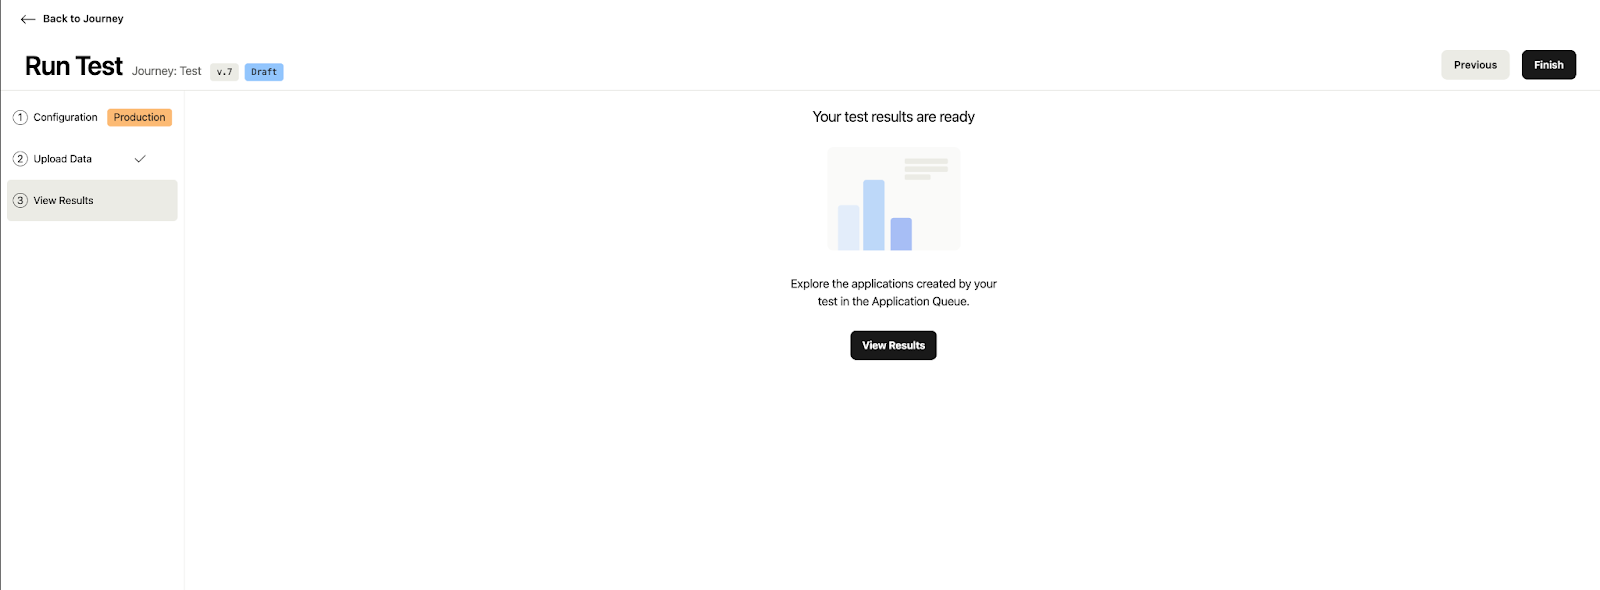
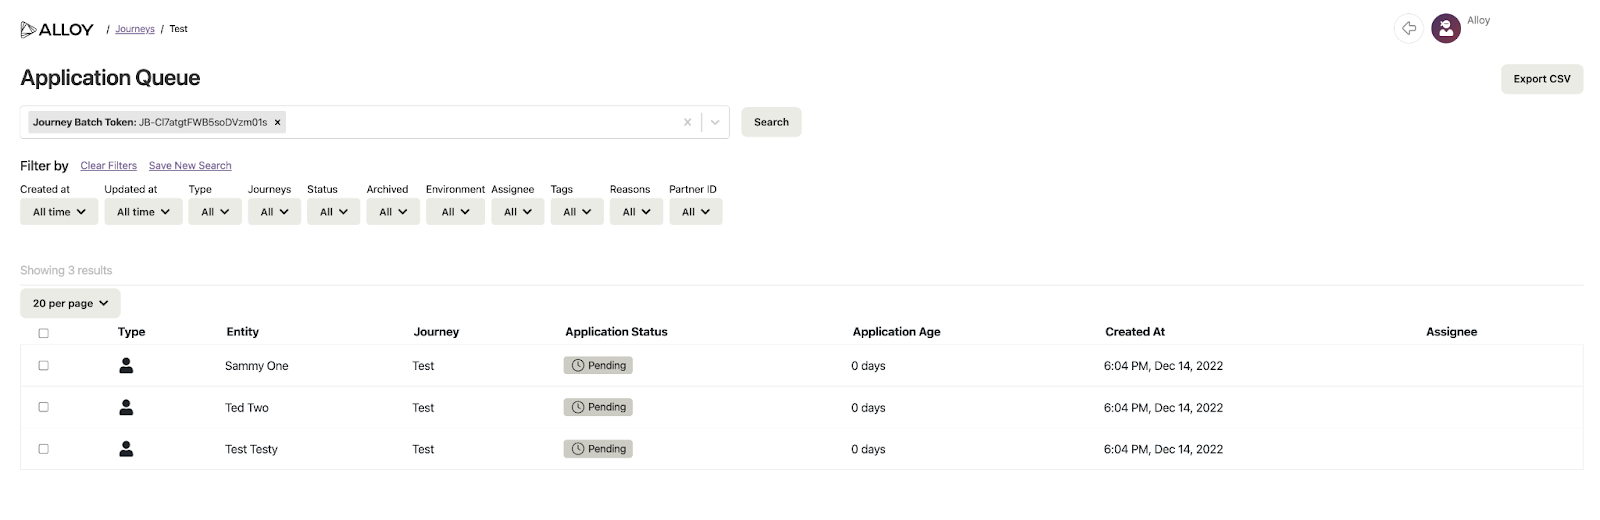
Once your data has been successfully uploaded, click ‘Run Test’. You’ll receive a confirmation within the dashboard once all applications have been created and you’ll be able to click ‘View Results’ to view all the applications that were a part of the batch file.
Once you click ‘View Results’, you’ll be directed to the Application Queue page and the search will automatically filter for the batch token that was applied to your batch test. The applications within the view will only include the applications that were a part of the batch file you uploaded. You can then click the ‘Export CSV’ button on the top right to download a report of these applications and their details.
Please note that clients can also run batches via API by using this endpoint. Please see our API Reference for more details.
Posted Feb 28, 2023
Journey nodes and outcome badge re-design
Posted
by Alloy
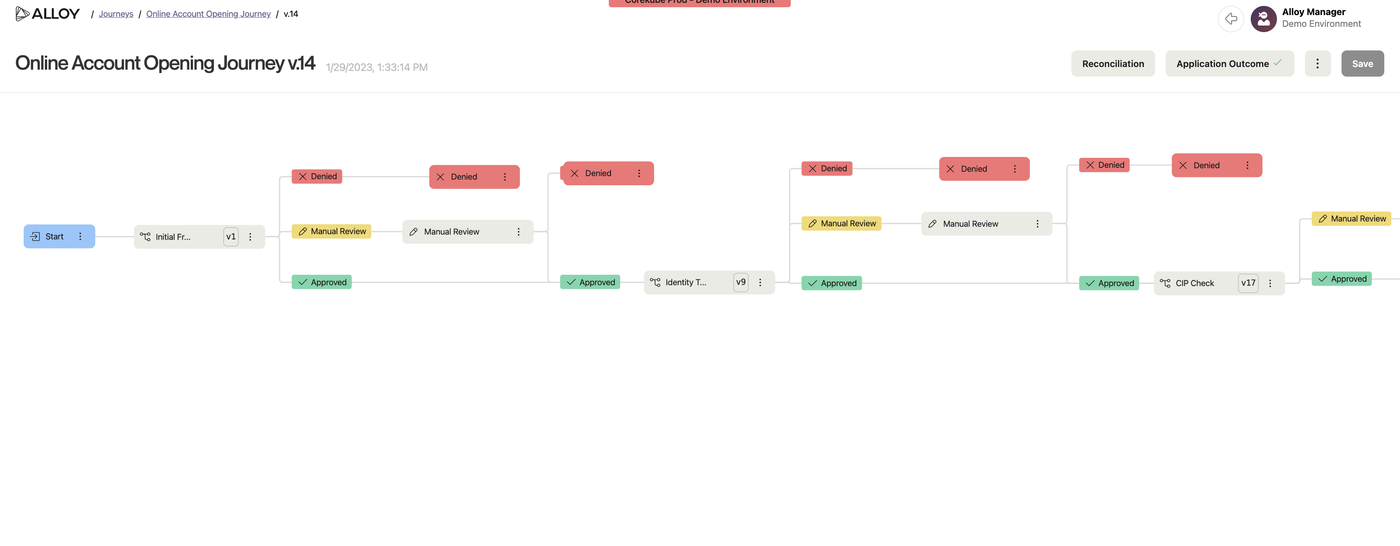
Parts of the Alloy Dashboard have received a UI refresh. You’ll notice a change with the look of Journey Nodes and Outcome badges. There are no functional changes with this release.
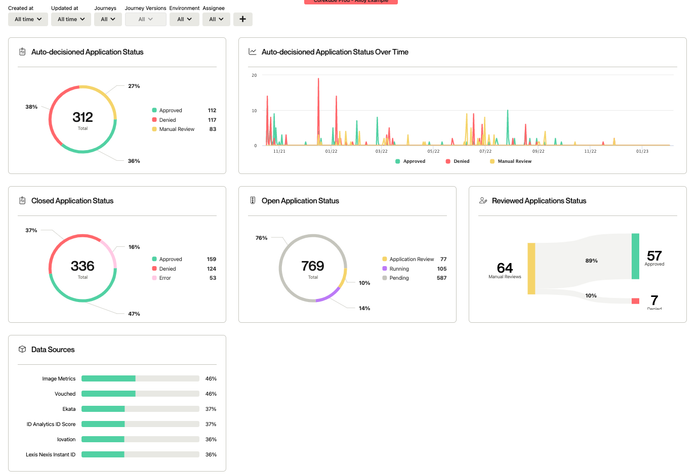
Clients using Journeys can now utilize the new Reporting and Analytics page directly within the Alloy dashboard to better measure and optimize their policy performance over time.
If you are already using Journeys, you’ll see that your homepage is now the Reporting and Analytics page. You will be able to view the following charts to derive insights:
Auto-decisioned Application Status: view the number of applications which are auto-approved, denied or sent to manual review in both an aggregate and over time view
Final Application Status: view a breakdown of final status for completed applications
Open Application Status: view a breakdown in the status of open applications
Reviewed Application Status: view the final status of applications that required a review within a Journey
Data Sources: view a breakdown in data source usage used within a Journey
To obtain a more granular look at the data, you will also be able to filter for specific Journeys (‘Journey name’), Versions, Date ranges (‘Created at time frame’, ‘Updated at time frame’), Archived status, Environment, Assignee, Tags, Reason codes, Outcome reasons, Data Sources, and Fraud Scores. Applying the filter criteria at the top will automatically refresh the graphs and display data that meets your applied criteria. After applying the filter criteria, you can click ‘View Application’ on the top right to view applications that meet the applied criteria within the Application Queue. These results can also be exported by clicking the ‘Export CSV’ button on the top right.
Please note, agents have been automatically permissioned to view the Analytics dashboard. To restrict access, navigate to Settings and uncheck ‘Agents can view the analytics dashboard’ permission for all role types.
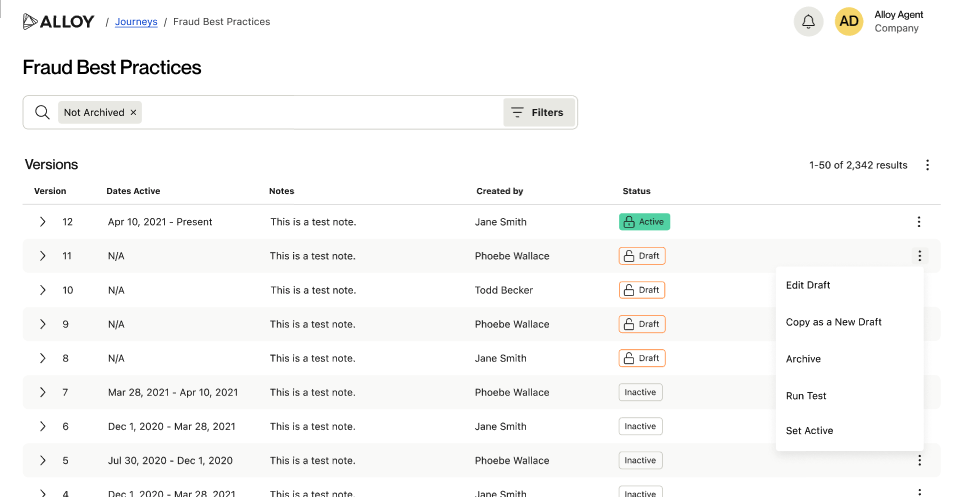
Clients using Journeys can now assign permissions to determine which Roles can view select Journeys, enabling clients to maintain separate access for their agents based on their organizational structure and business needs.
To get started, navigate to Settings > Roles. To enable access to all Journeys for a given Role, from the Roles section, check the top-level option ‘Journeys’. This means this role will have access to all non-archived Journeys (including draft versions) in the account, in addition to all Applications, Workflows, Evaluations, Reviews, and Entities associated with those Journeys. To restrict access to specific Journeys, choose the Journeys in the drop down – this will allow the user to have access to all Applications, Workflows, Evaluations, Entities, and Reviews that are associated with the Journey(s) selected there. To restrict access to Journeys altogether, deselect the top-level ‘Journeys’ option.
Note: these permissions will not override access for users who have access to ‘All workflows’ in Settings > Workflows.
Posted Feb 5, 2023
Addition of Tradelines, Equifax Credit Data and TransUnion Credit Data in Credit Panel
Clients using the credit panel will now see a broader set of credit report and tradeline data from the credit bureaus in the US, enabling them to conduct holistic and robust credit reviews. Previously, the credit panel only surfaced data from Experian.
The following data sources will now be surfaced in the credit panel:
Equifax
Consumer credit data
Business credit data
Tradelines for Equifax consumer and business credit
Experian
Tradelines for consumer credit (Experian consumer credit and Experian Netconnect)
Transunion
Consumer credit
Tradelines for consumer credit
View and Create Published Attributes Values in the Entity view
Clients using Published Attributes can now view and edit (which includes creating new values) Published Attributes values, allowing for more holistic and flexible decisioning. ‘Published Attributes are custom entity-level attributes that you can define and use in your decisioning throughout the customer lifecycle.
Published attributes can be viewed and edited directly in the Entity view or Entity Side Panel. You can view the most recent 5 values. Please note: in order to create a new Published Attributes value, users must be appropriately permissioned (Settings > Roles > Published Attributes)/
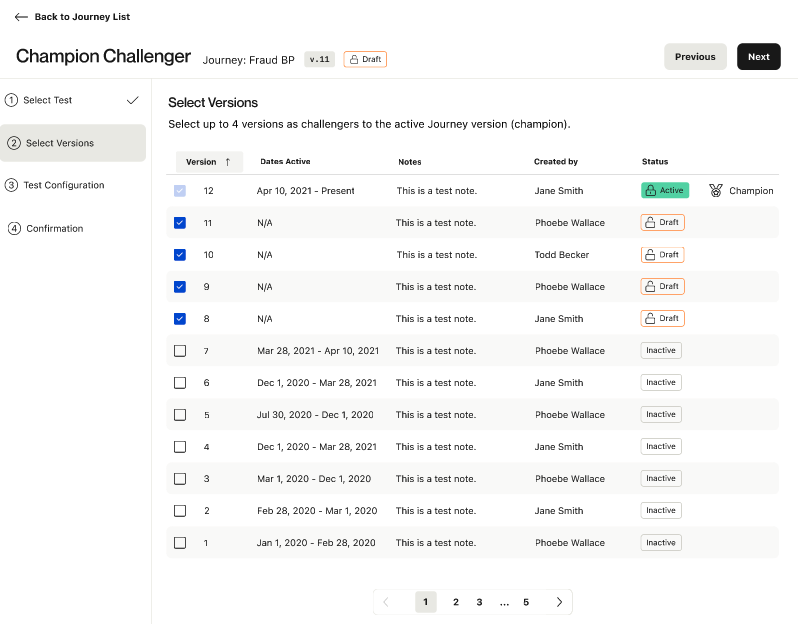
Clients using Journeys can now more comprehensively test and optimize the performance of their policies by utilizing Champion Challenger to test different versions of their Journey. Champion Challenger is a tool that allows you to A/B test up to 5 different versions of your decisioning logic and evaluate the differences in performance between the decisioning logic. Previously, Champion Challenger was only available for testing at a workflow level.
To get started, navigate to the Journey Versions page for the Journey you wish to test. Click on the vertical ellipsis menu of a draft version that you want to test against the active version (champion), and then click Run Test which will bring you to the Testing Suite.
Select Champion Challenger to start configuring your test.
Next, select up to 4 versions you want to include in your test. The active version of your Journey (aka the Champion) will be selected by default.
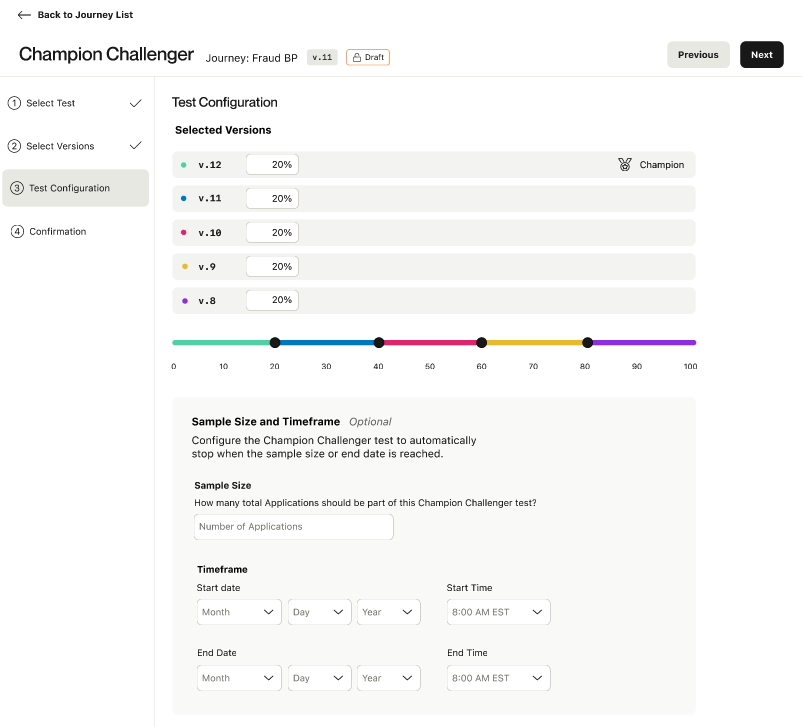
Then, configure the percentage allocation for each version. You can also choose to enter a sample size and start and end date on this screen. The Champion Challenger test will automatically end once either the sample size or end date is reached.
On the last screen, confirm the details of your test and click Start Test.
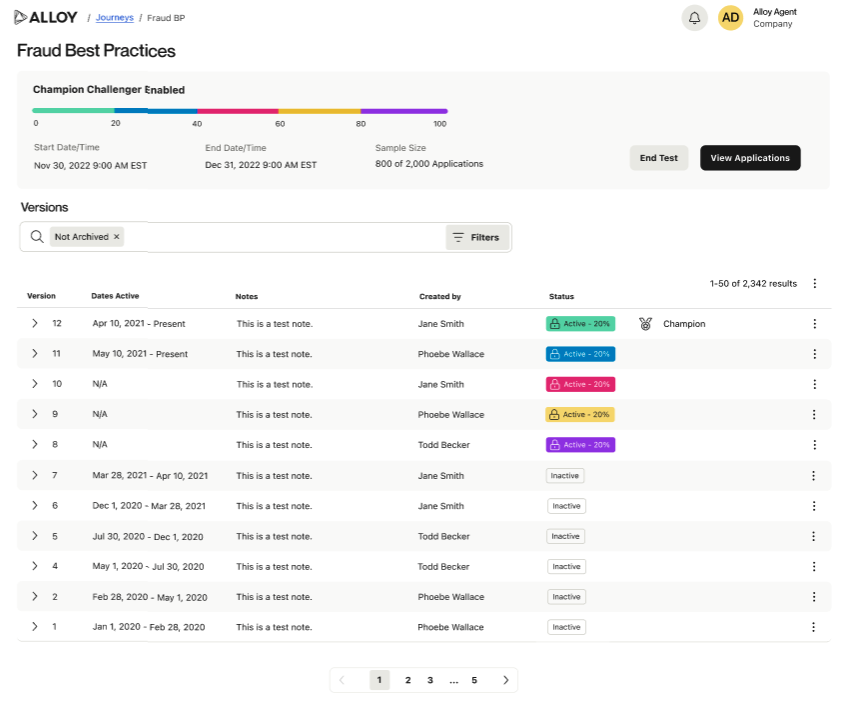
You will then be able to view progress and results of the test on the Journeys Versions page.