Product Updates

Champion Challenger for Journeys

Clients using Journeys can now more comprehensively test and optimize the performance of their policies by utilizing Champion Challenger to test different versions of their Journey. Champion Challenger is a tool that allows you to A/B test up to 5 different versions of your decisioning logic and evaluate the differences in performance between the decisioning logic. Previously, Champion Challenger was only available for testing at a workflow level.

To get started, navigate to the Journey Versions page for the Journey you wish to test. Click on the vertical ellipsis menu of a draft version that you want to test against the active version (champion), and then click Run Test which will bring you to the Testing Suite.

Select Champion Challenger to start configuring your test.

Next, select up to 4 versions you want to include in your test. The active version of your Journey (aka the Champion) will be selected by default.

Then, configure the percentage allocation for each version. You can also choose to enter a sample size and start and end date on this screen. The Champion Challenger test will automatically end once either the sample size or end date is reached.

On the last screen, confirm the details of your test and click Start Test.

You will then be able to view progress and results of the test on the Journeys Versions page.


Flexible business document upload in the Alloy SDK

The Alloy SDK web plugin now supports a wider range of business documents with a new document type ‘Business Document’, which allows clients to more flexibly configure their chosen business document (e.g. Articles of Incorporation) without having to choose from a pre-set menu of options.

On the SDK Configuration screen, clients will be able to select the option ‘Business Document’ and optionally enter help text to guide the user during the document upload process (for example: “Please upload your paystub as secondary income verification”.

Dashboard setup instructions for the Alloy SDK are here and API docs are here. Reach out to your CSM if you'd like to get it set up.

Persona plug-in for Alloy SDK

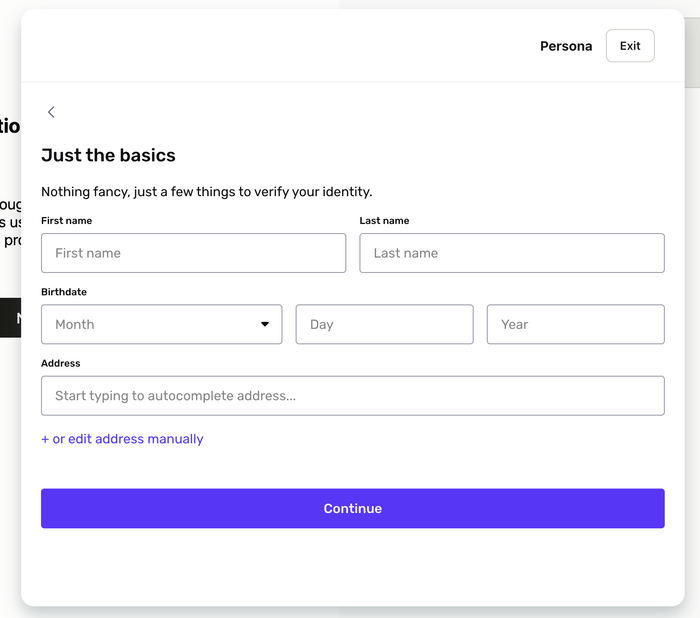
The Alloy SDK now supports the Persona documentation verification flow. Persona provides identity verification with extensive global coverage and liveness detection.

If you’re already using the Alloy SDK, simply select "Persona" as a plugin option in your workflow. No code changes are required. Dashboard setup instructions are here and API docs are here. Reach out to your CSM if you'd like to get it set up.

Global PII available in the dashboard for decisioning

Clients can now view global identity data identifiers (such as national ID # or business registry ID) in the Alloy dashboard in addition to being able to utilize these identifiers in their decisioning, making the Alloy platform more accessible for users across the world.

Starting today, clients can see and leverage global identity attributes on all Alloy dashboards and tools including (but not limited to): Entity page, Entity and Business Evaluations pages, Workflow Rule Builder, Identity Element Velocity, and Allow/Denylists.

Application escalation

Agents using Journeys can now escalate applications to other agents within a specific role type, allowing for more efficient review of applications and streamlined collaboration among teams.

Once the application is escalated, it automatically will be assigned to an agent within that role that has the most bandwidth. Agents who receive the escalated application will be notified in the dashboard and will also see an escalated badge next to the application within the Application Queue.

To get started, navigate to the Application Queue and select an application. In the Application view click the vertical ellipses menu on the top right corner and the click on ‘Escalate Application’.

You will then be prompted to enter the following details: the role type you’d like to escalate to, the reason why you’d like to escalate, and any notes you’d like to leave for the agent that is receiving the escalated application. Click ‘Submit’ once you’ve completed the required fields and you’ll receive a confirmation message that says the “Application escalated successfully”.

Agents can check if they’ve been assigned an application in the Application Queue in the column ‘Assignee’ followed by an orange escalation badge. The escalation badge will disappear once the agent takes an action on the application.

SDK Key Dashboard

Clients can now self-service their SDK key directly in the Alloy dashboard. Previously, clients had to rely on Alloy admins to create the SDK key.


Simply select ‘SDK Key’ from the Settings’ menu to view your unique SDK key. To create a new key, click the ‘Generate new key’ button and respond to the prompt to confirm the action. Please note, generating a new key will require you to update any existing code. You will also be able to view and amend Alloy List domains on the same page.

Agents must be appropriately permissioned to view and generate keys.

If you’d like to get set up with Alloy SDK, please reach out to your CSM.

Saved Searches for Application Queue

Clients using Journeys can now set and save filters as a Saved Search within the Application Queue to create more simplified and efficient custom review queues for different role types.

A Saved Search can be assigned to a specific role within the Settings page. Once assigned, users with this role type will automatically see applications with the pre-set filters from the Saved Search. For example, if a Saved Search is created with filters for applications that require a fraud review and then assigned to the fraud team, this team will only see applications that require a fraud review without needing to manually filter for them each time.

To get started, navigate to the Application Queue and set the filters you want. Next, click the ‘Save Search’ button on the top right.

You will then be prompted to enter details about the Saved Search such as name, description, and whether the search is to be viewable by all employees. Click Save once you’ve completed the required fields.

To view all the Saved Searches in a particular account, navigate to Settings > Searches.

To assign a Saved Search to a role, navigate to Settings > Roles and click on the role. Next, click on the Default Searches tab and you’ll see a dropdown for the Application Queue. If you click on the Application Queue drop-down, you’ll see a list of all the saved searches and you can select the one you’d like to assign to that role type.

Custom Review Action Types and Outcomes in Journeys

Clients can now set custom review types and outcomes in Journeys to fit their risk policies and allow their teams to work more efficiently. Previously, only the default Manual Review type and Approved and Denied outcomes were available.

To configure a custom review type, go to the Journeys page and click on ‘Manage Actions’ on the top right. Click ‘Add Action’ on the Actions page.

Indicate the name of the custom review type in ‘Action Name’ and select ‘Review’ as the Action Type. To configure a custom outcome, click ‘Create New Outcome’ at the bottom of the window. Once you’ve completed the prompted fields, click ‘Save’ and this review type and its associated outcomes will now be saved and ready for you to use within a Journey.

The new review type can then be configured in a Journey under the ‘Review’ dropdown menu. Please note: the Manual Review option will still be accessible by default and will only have an approved and denied outcome.

Back