Workforce Analytics
Managing your team's performance and queue capacity just got a lot easier.
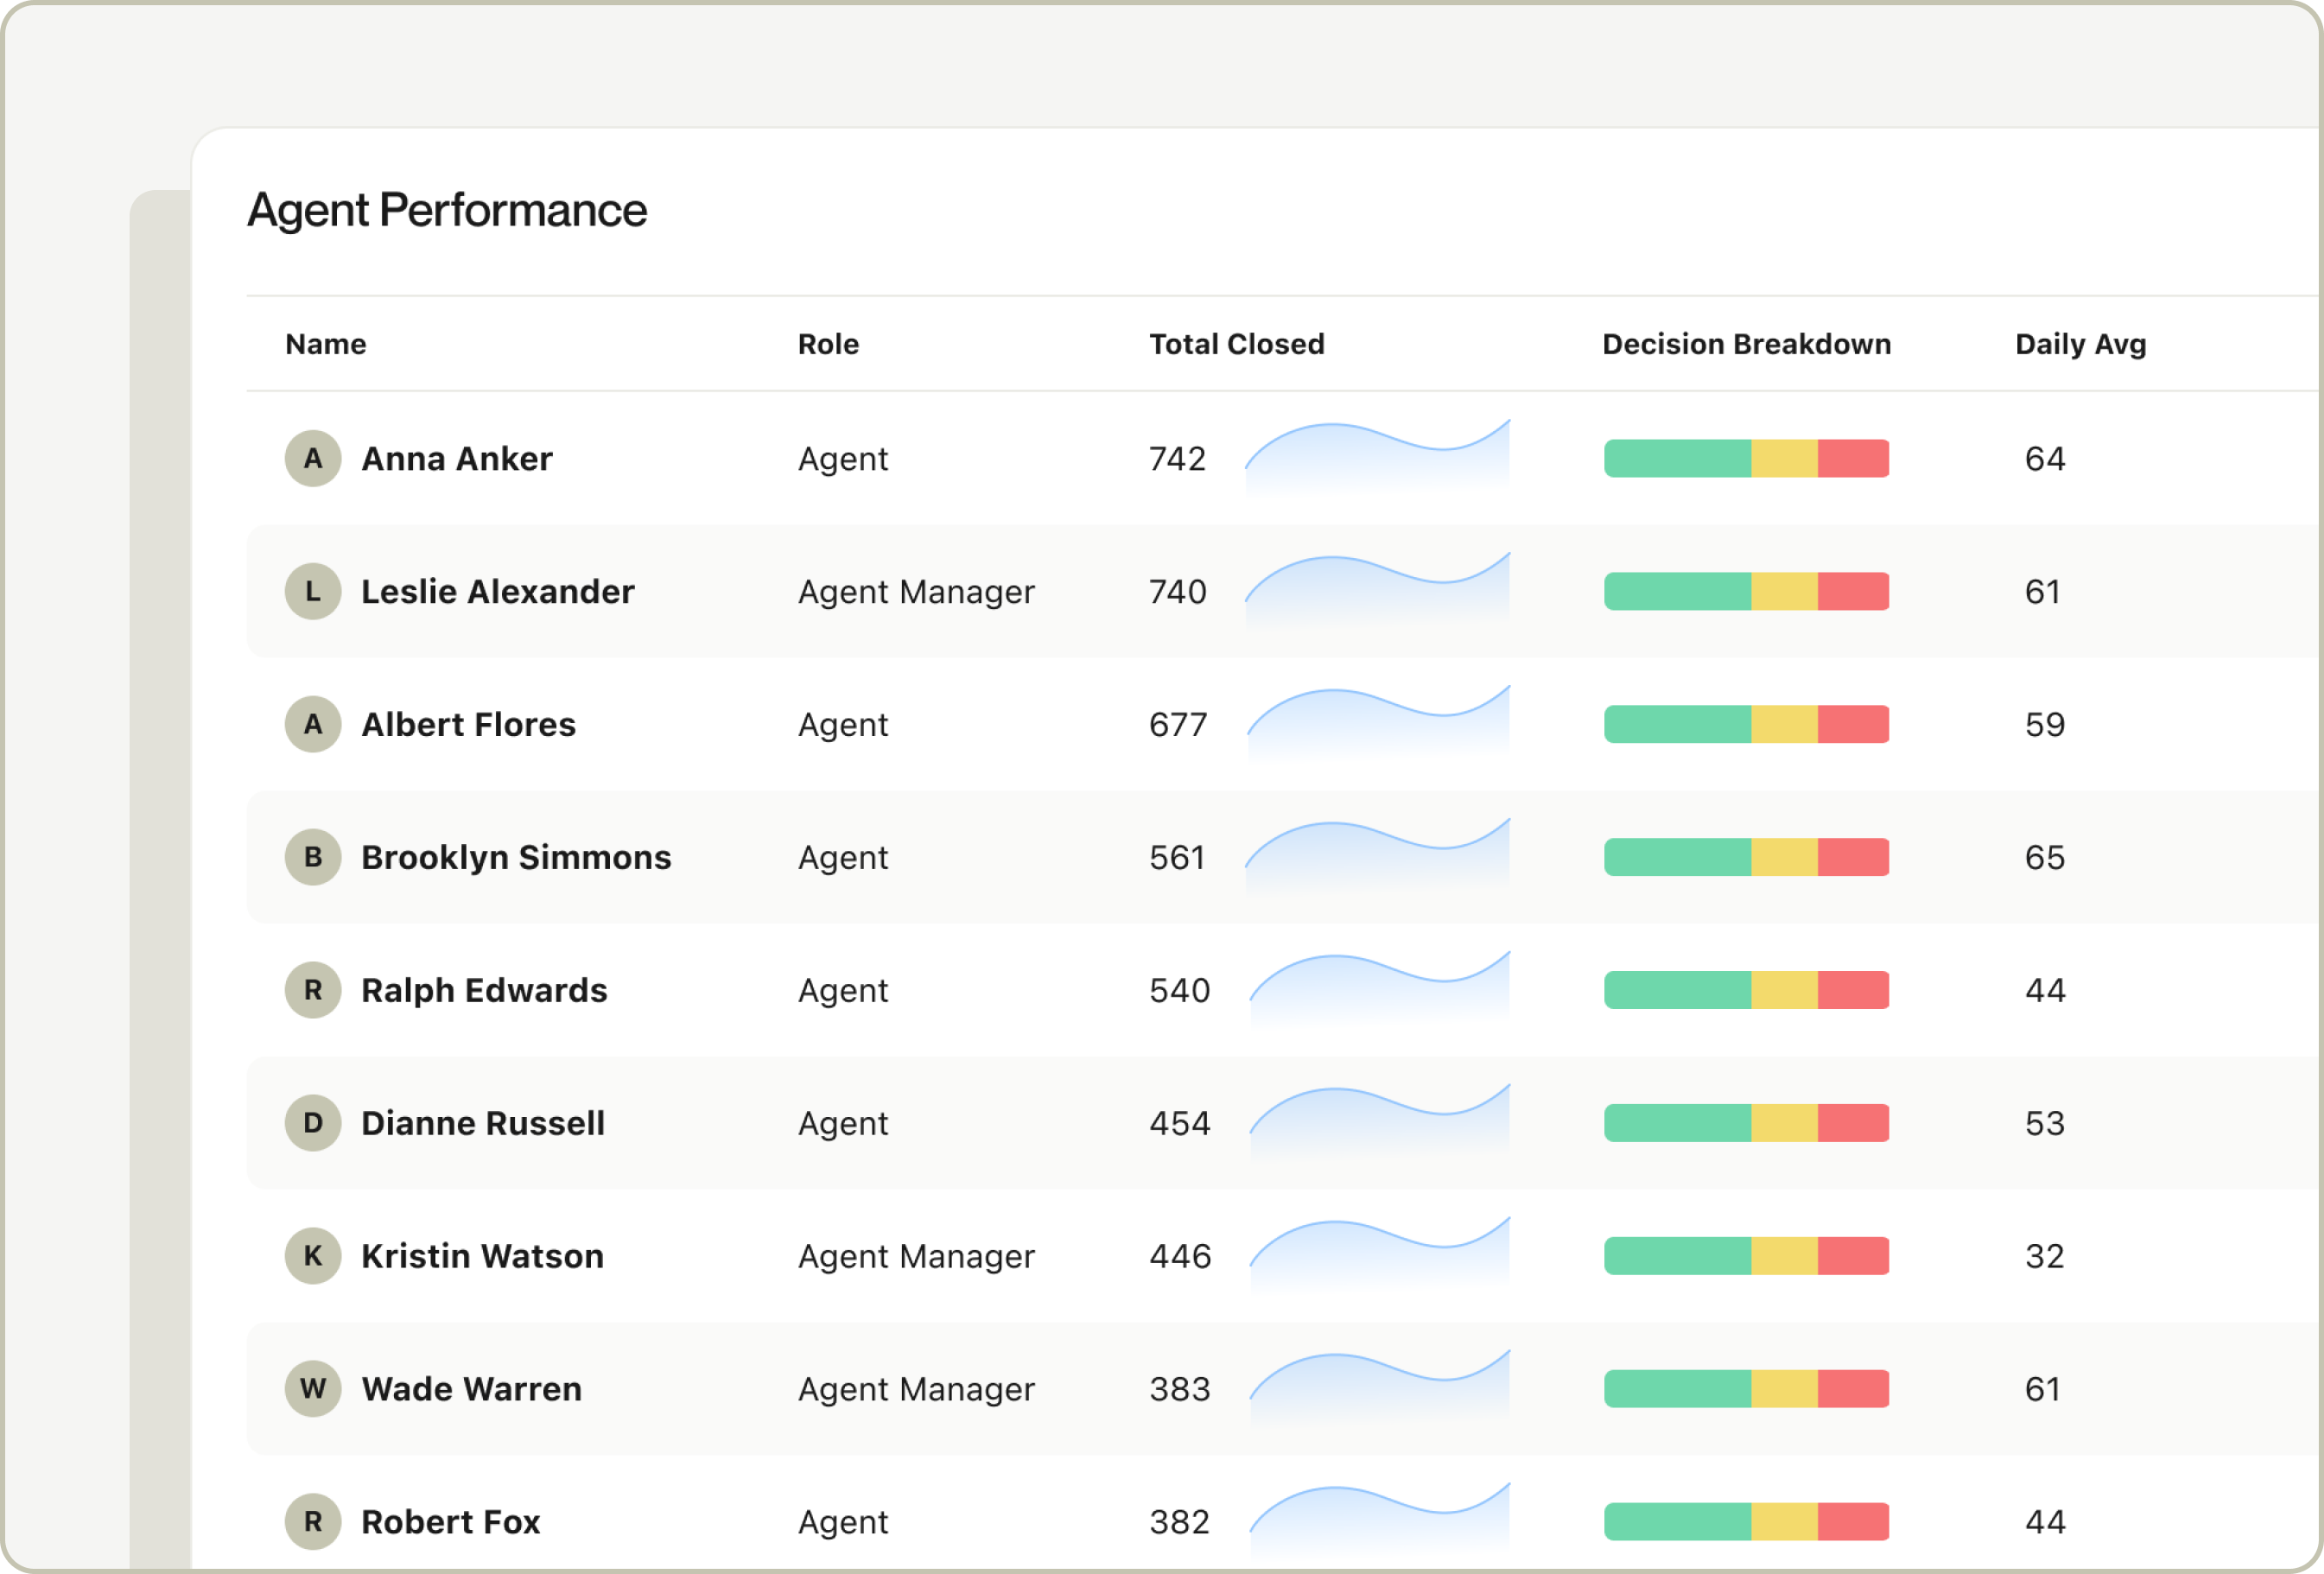
We're excited to introduce Workforce Analytics, your new tool for tracking agent and team performance directly within Alloy. Workforce Analytics gives Agent and Operations Managers visibility into team performance, queue volumes, and individual output, so you can make smarter staffing decisions and keep queue wait times down, without relying on manual reports.
With Workforce Analytics, you can:
- Measure agent performance: Track individual output to identify top performers and surface coaching and training opportunities across your team.
- Understand team capacity: Monitor overall review volumes and estimate team capacity to make more informed staffing decisions.
- Act on top KPIs: Access high-level insights with deep-links into specific sections so you can quickly get to the data that matters most.
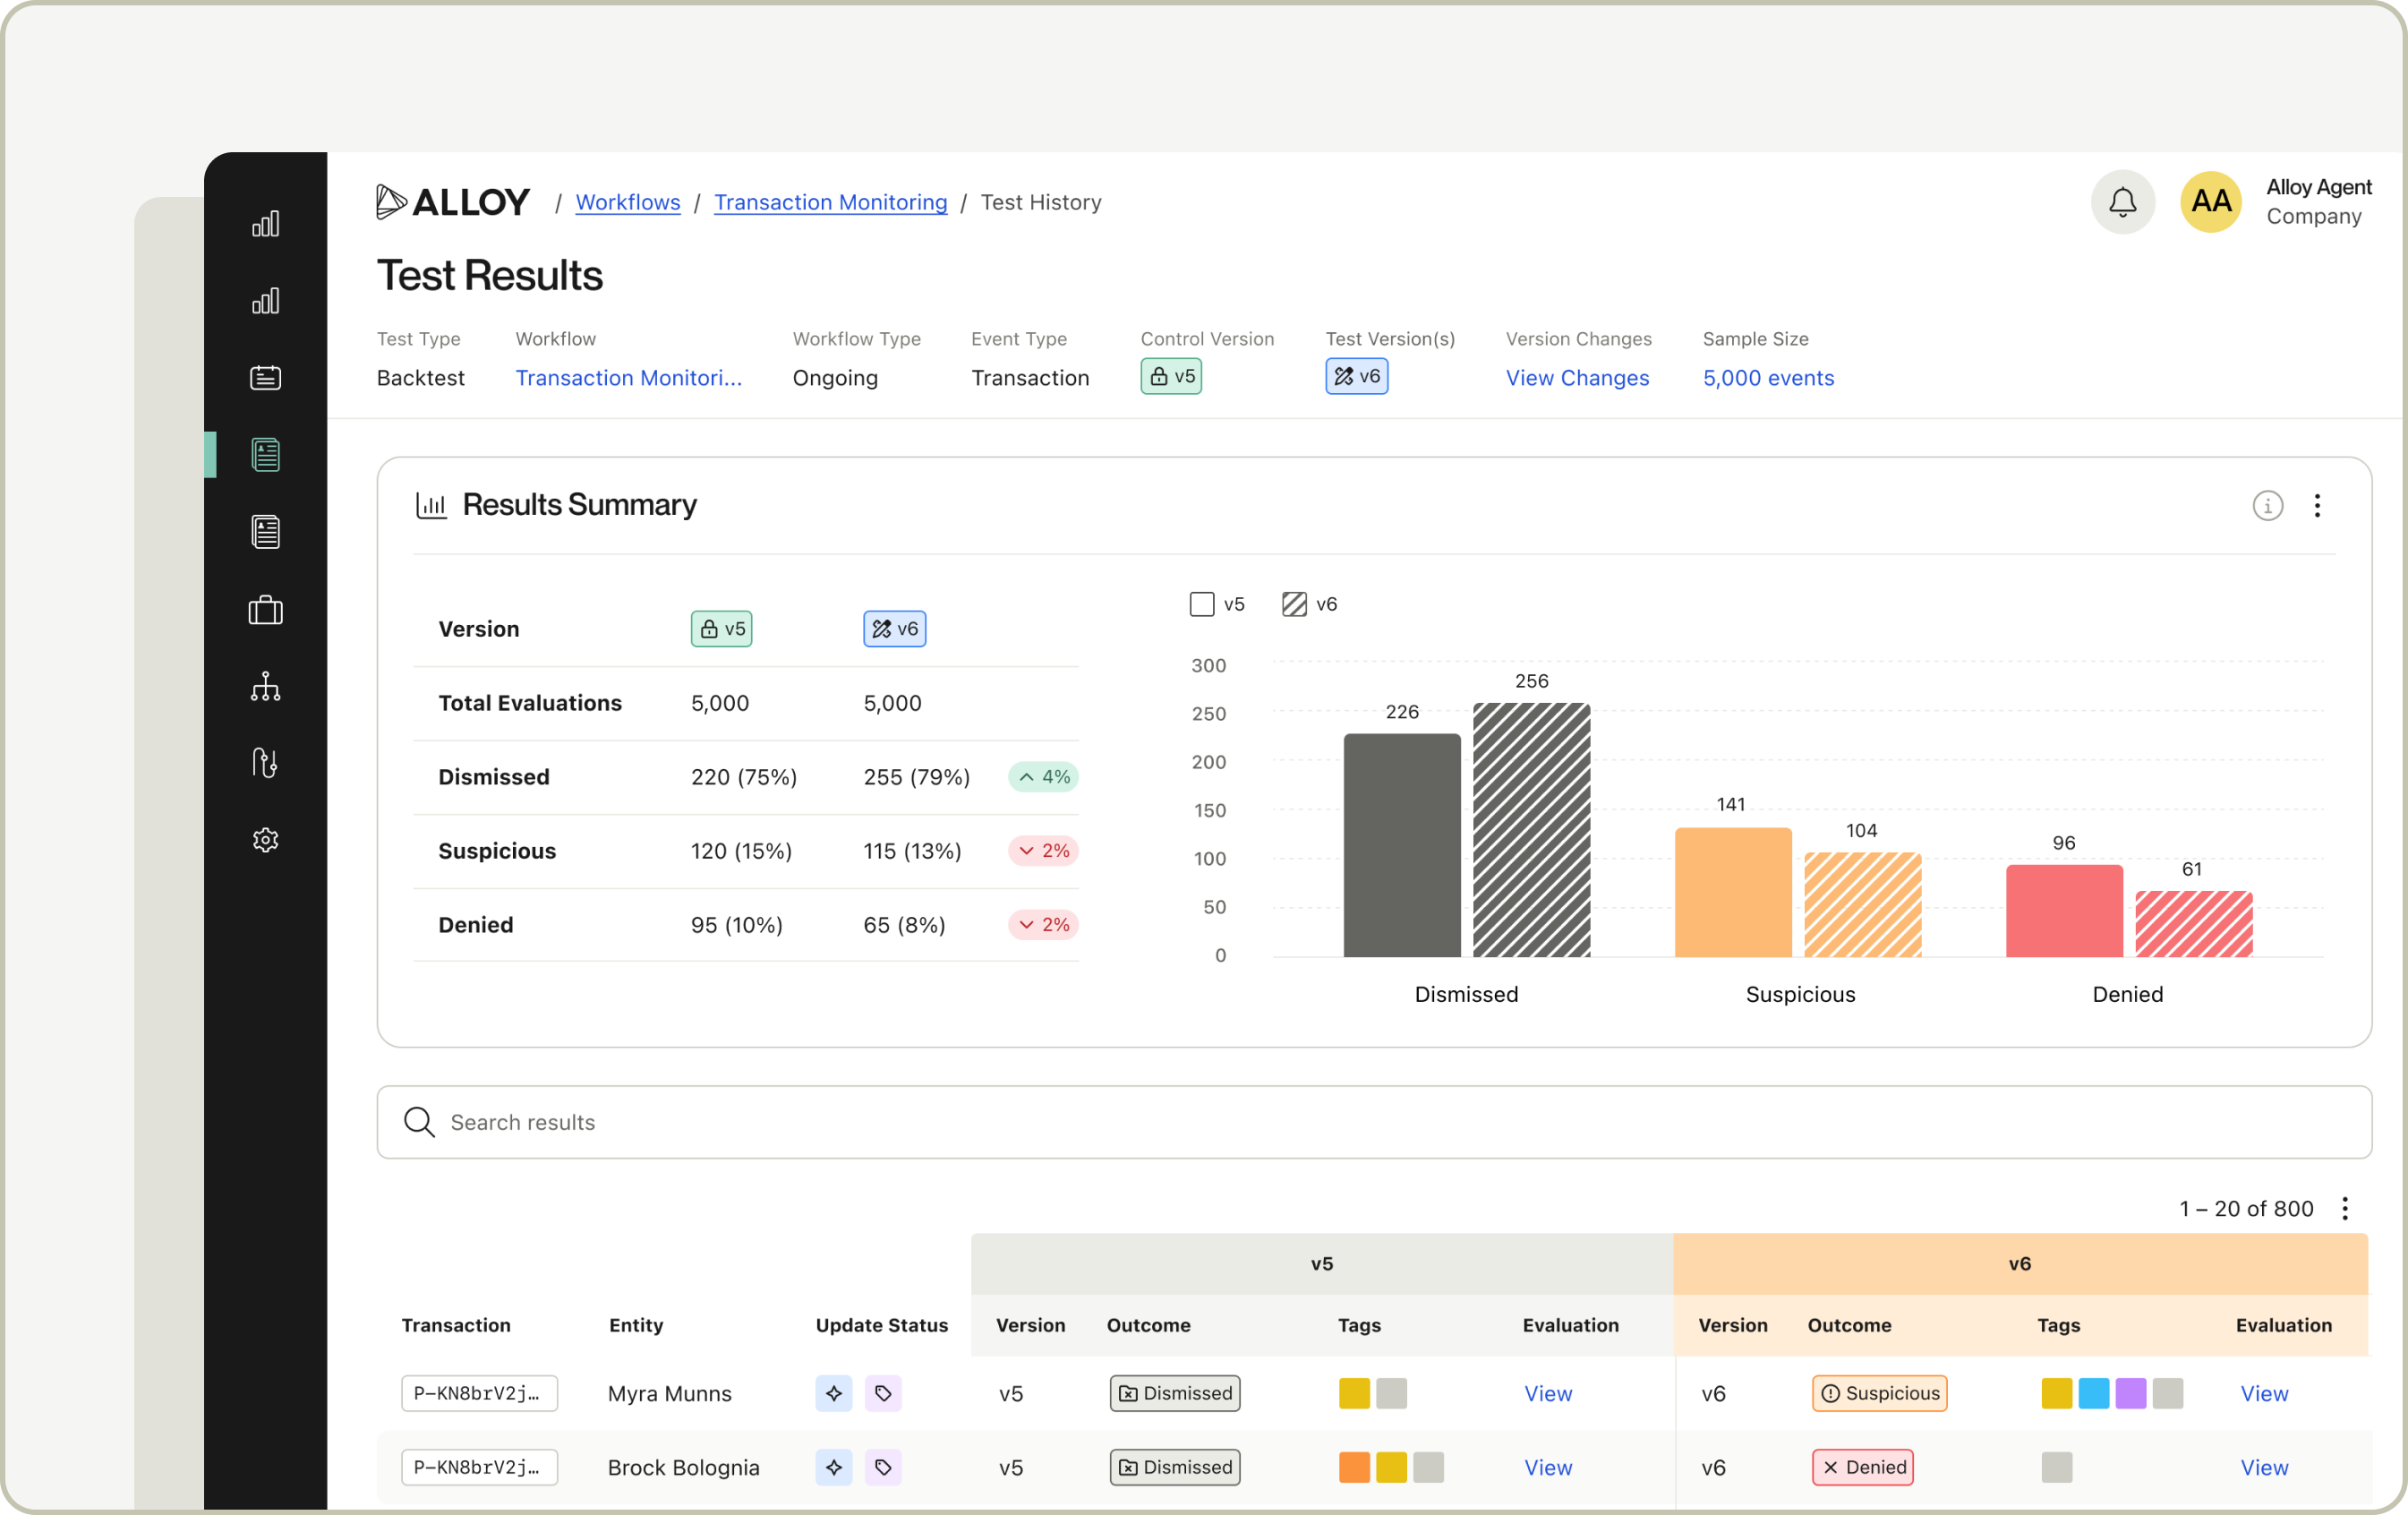
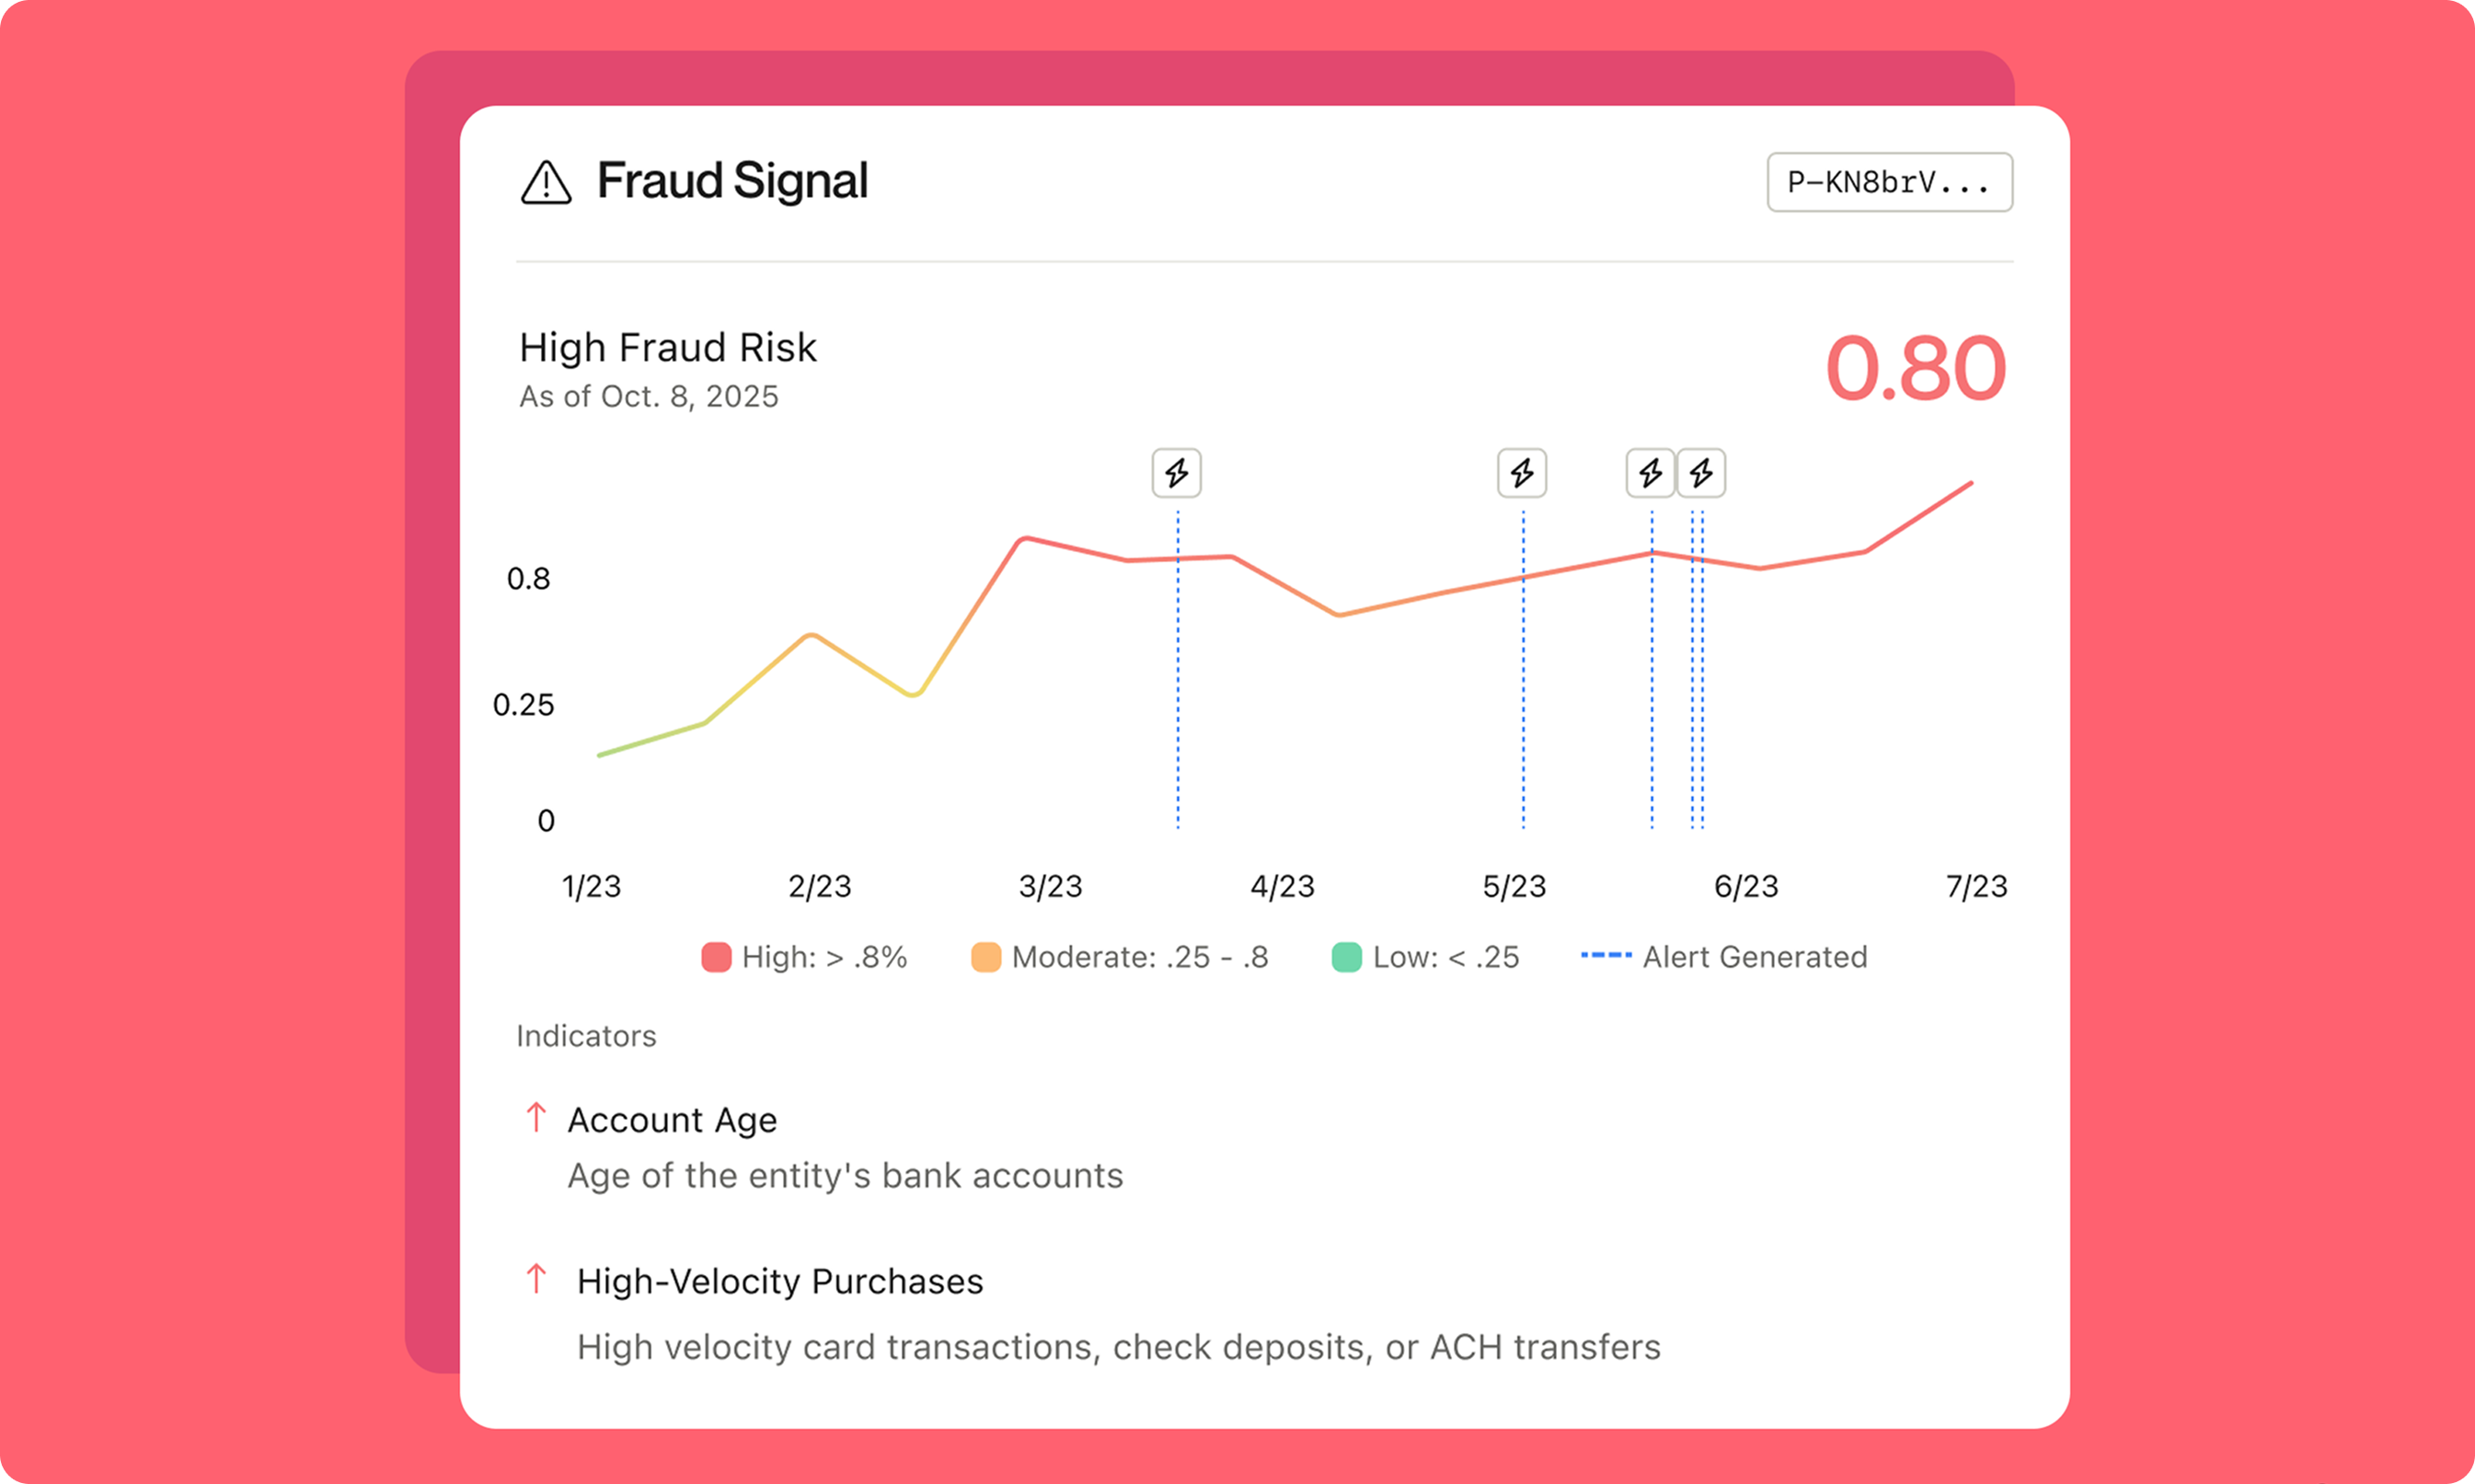
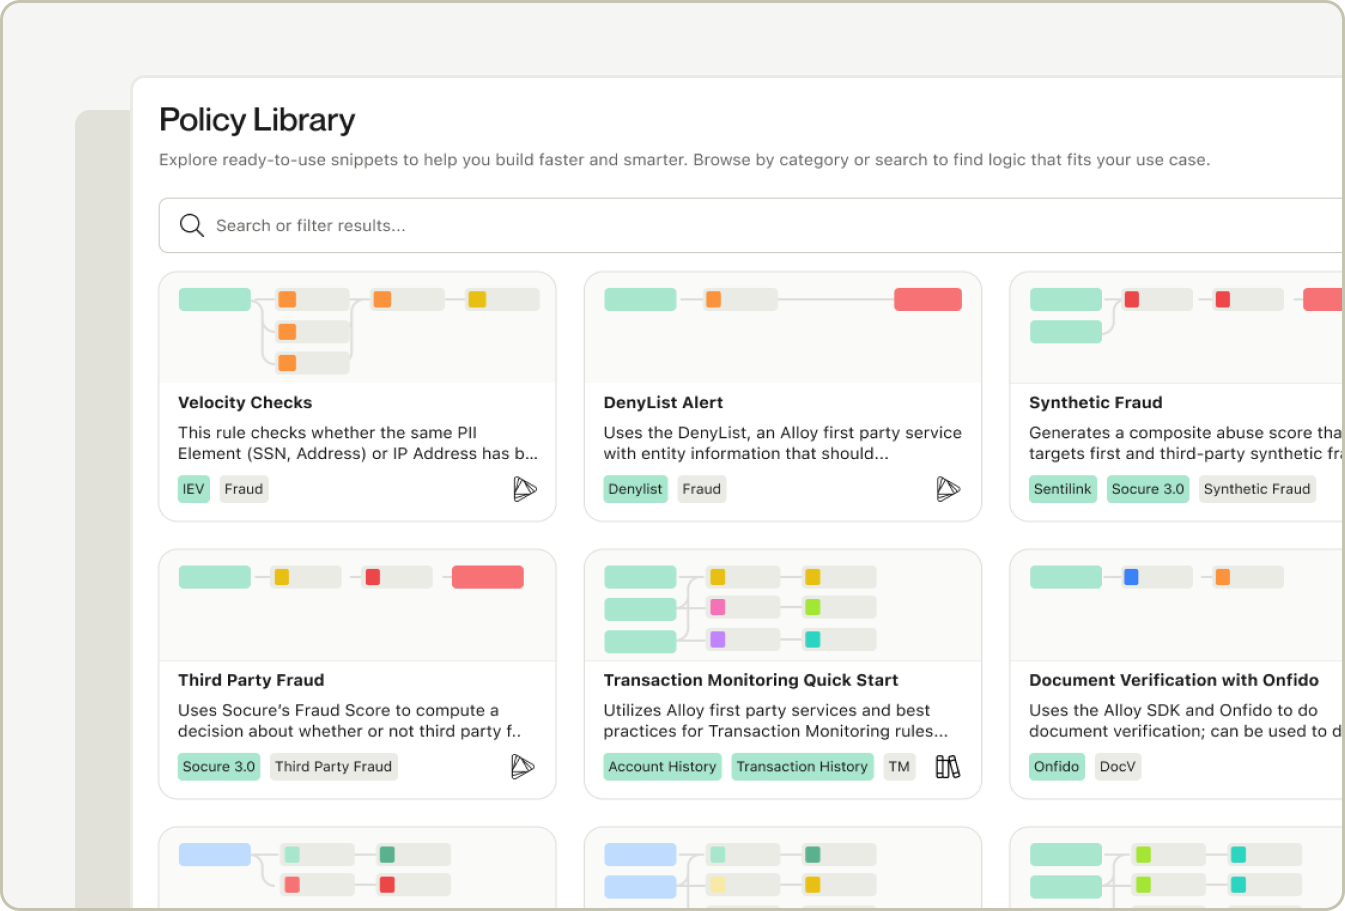
Workforce Analytics is available for accounts utilizing Journeys and roles with the "Agent can view workforce analytics" permission enabled. To get started, navigate to the Analytics section in your Alloy dashboard.