Partner Center & Partner Testing Program
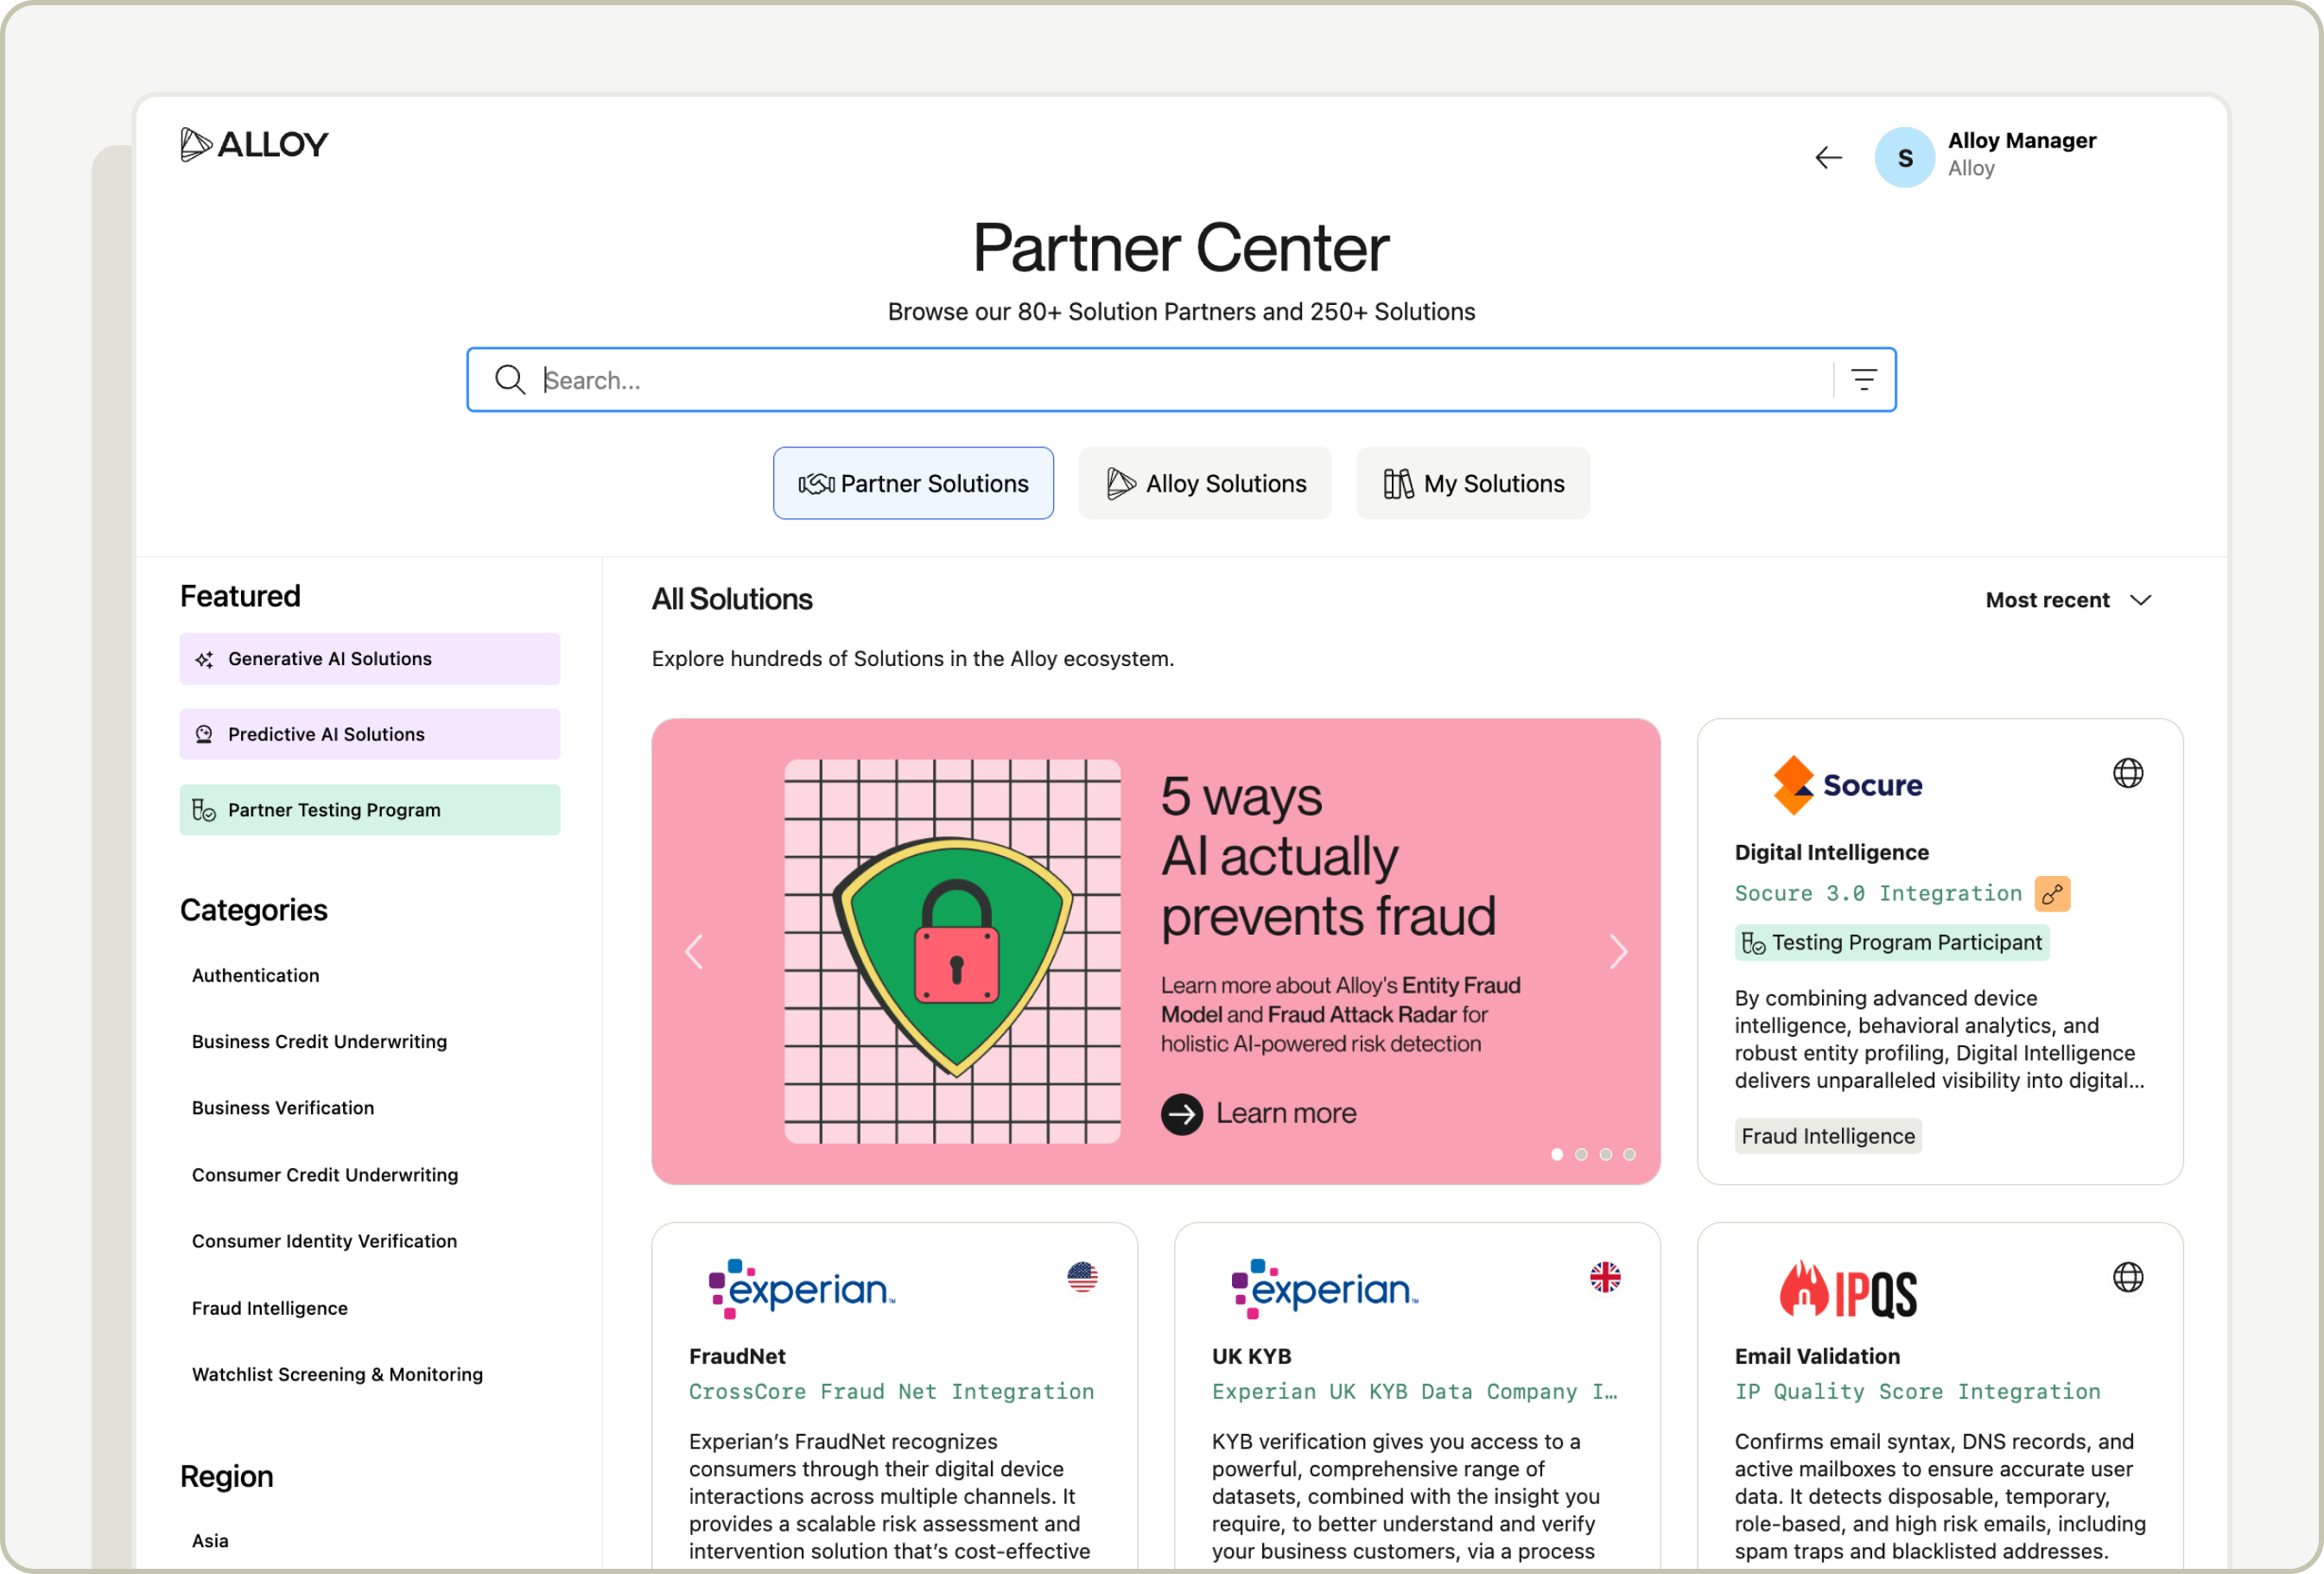
You can now explore the full catalog of over 250 partner solutions available through Alloy in our new Partner Center. Designed to simplify discovery and evaluation, the Partner Center lets you easily find, compare, and review the latest information on our third-party integrations. It is globally available to all clients and fully integrated into your dashboard experience.
With intuitive search and filter capabilities, you can explore solution partners by category, region, use case, and more, as well as view and manage your active integrations in one centralized place. Individual solution integration pages offer detailed company and product descriptions, access to technical resources like sample API responses, and more.
On the Partner Center homepage you can also filter solutions by featured categories, such as AI/ML functionality and inclusion in Alloy’s new Partner Testing Program, which allows you to test up to 1,000 calls at no additional cost when trialing solutions resold by Alloy for the first time.
You can navigate to the Partner Center homepage via a new lefthand side menu option. Check out our demo walkthrough video here.