Clients on the Alloy SDK can use the Prove Mobile Auth SDK Plugin to automatically verify a customer's device on page load if the device is connected to mobile carrier data and on a supported mobile carrier network. Prove Mobile Auth provides the same level of verification as Prove Instant Link.
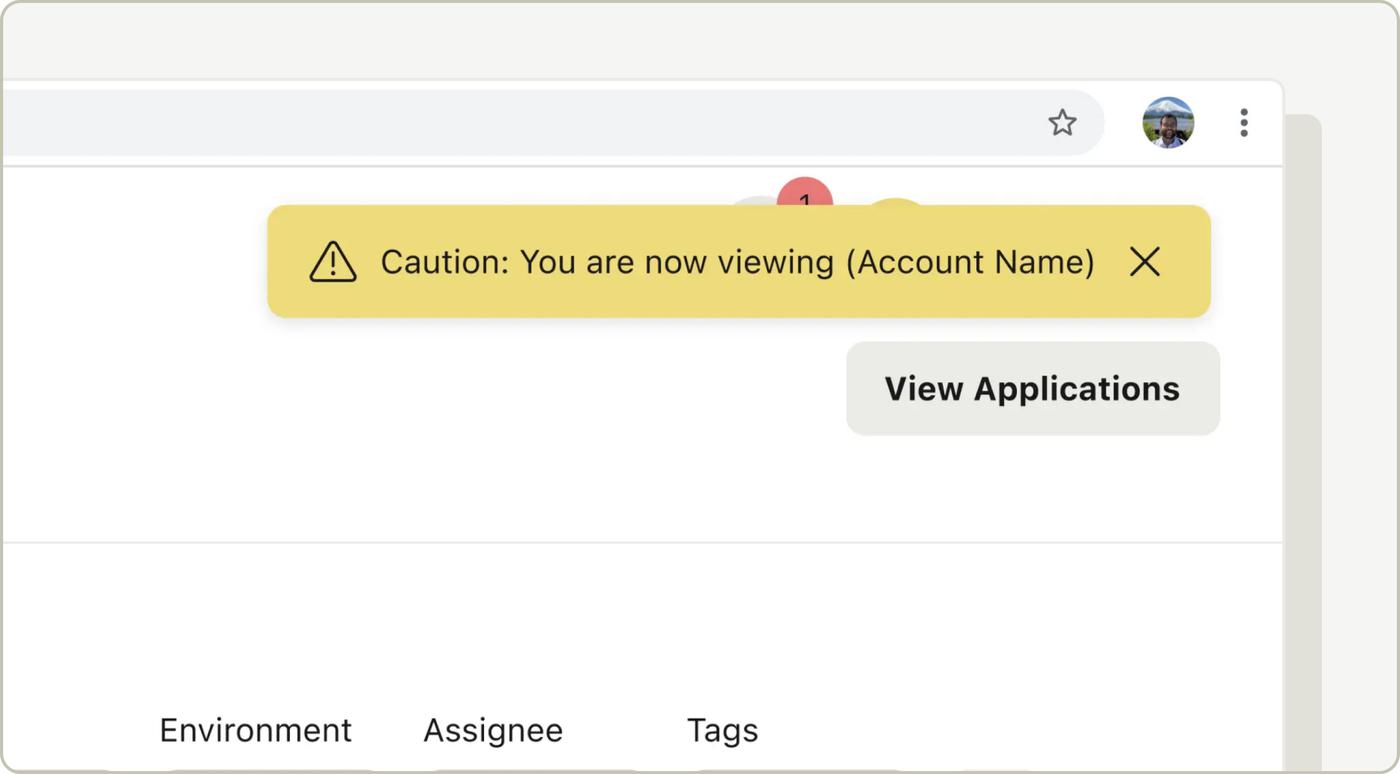
Users that have access to multiple Alloy accounts (e.g. Sandbox vs. Production) will now see a warning in the top right of their screen alerting them to the account they’ve switched to.
Clients on the Alloy SDK can use the new IDnow SDK Plugin for document verification and liveness check. IDnow’s Identity Proofing Service (IPS) verifies a customer’s identity based on the live capture of an Identity Document and the customer’s face. IPS is a global service that returns a verdict (success, failure), an analysis of the verdict, data about the individual being verified & submitted documents, as well as a PDF report containing the result of the identity verification.
This system is composed of two elements:
A REST API for the creation, deletion, and retrieval of the Identity Proofing context and results.
A WEB SDK that will capture the document and the face of the customer.
Use cases:
Document verification to validate more than 3,000 identity documents from 195 countries.
Biometric verification to confirm the existence of an identity and that the person is physically present during the verification process.
Clients using What-if Analysis can now access historical testing results in a new Test History page. This page includes information about when a test was run, the type of test, the status of the test and the results of the test. With this feature, clients have a single home to view both a summary and detailed historical test results at any given time.
In order to access the Test History page, navigate to the Workflow page and click on the Workflow you’d like to see test results for. You’ll notice a new tab at the top of the page where you can toggle between viewing the Workflow’s Versions and viewing the Workflow’s Test History. Click on the Test History tab to dive into the results.
Sandbox Profiles are now available in the Alloy Testing Suite for Journeys clients. Sandbox Profiles enables clients to autonomously test out scenarios that require a coerced value directly within the platform instead of having to use any external developer tools.
In order get started with Sandbox Profiles, navigate to the Journey builder and click on the Test button on the top right to open up the Testing Suite.
If you’d like to try Journeys, reach out to your CSM or [email protected] to learn more.
Posted Apr 17, 2023
Alloy’s SAR filing + FinCEN integration now supports continuing reports & validation of required fields
Alloy's FinCEN integration now supports the full SAR lifecycle - initial, amended, and continuing reports! With the addition of continuing reports, clients can report when an entity continues to conduct activity in the 90 days since the last successful report submission. Field level validations help agents provide all of the required information to submit to FinCEN, reducing the chance of a report being rejects and helping agents spend less time updating and re-submitting reports.
Please reach out to your CSM or [email protected] if you'd like to be set up with this feature.
Clients using Journeys can now upload and test batch files directly within the Alloy dashboard. The file will be checked for any formatting or validation errors prior to running the test, and once complete, you’ll be able to view the results in the dashboard. This functionality is applicable for KYC and KYB use cases, including applications with multiple entities.
To get started, go to the Journeys page and click the vertical ellipses on the right of your chosen draft Journey, and select ‘Run Test’ which will open the Testing Suite.
Once you’ve selected the environment you want to run your test in (Sandbox or Production), you’ll be prompted to upload your data.
You can either upload a file from your computer (or download our template) or manually input your data into the table. Our validation tool will test if the batch file you have prepared for upload is in the correct format and surface any errors for you to resolve before running the test.
Once your data has been successfully uploaded, click ‘Run Test’. You’ll receive a confirmation within the dashboard once all applications have been created and you’ll be able to click ‘View Results’ to view all the applications that were a part of the batch file.
Once you click ‘View Results’, you’ll be directed to the Application Queue page and the search will automatically filter for the batch token that was applied to your batch test. The applications within the view will only include the applications that were a part of the batch file you uploaded. You can then click the ‘Export CSV’ button on the top right to download a report of these applications and their details.
Please note that clients can also run batches via API by using this endpoint. Please see our API Reference for more details.