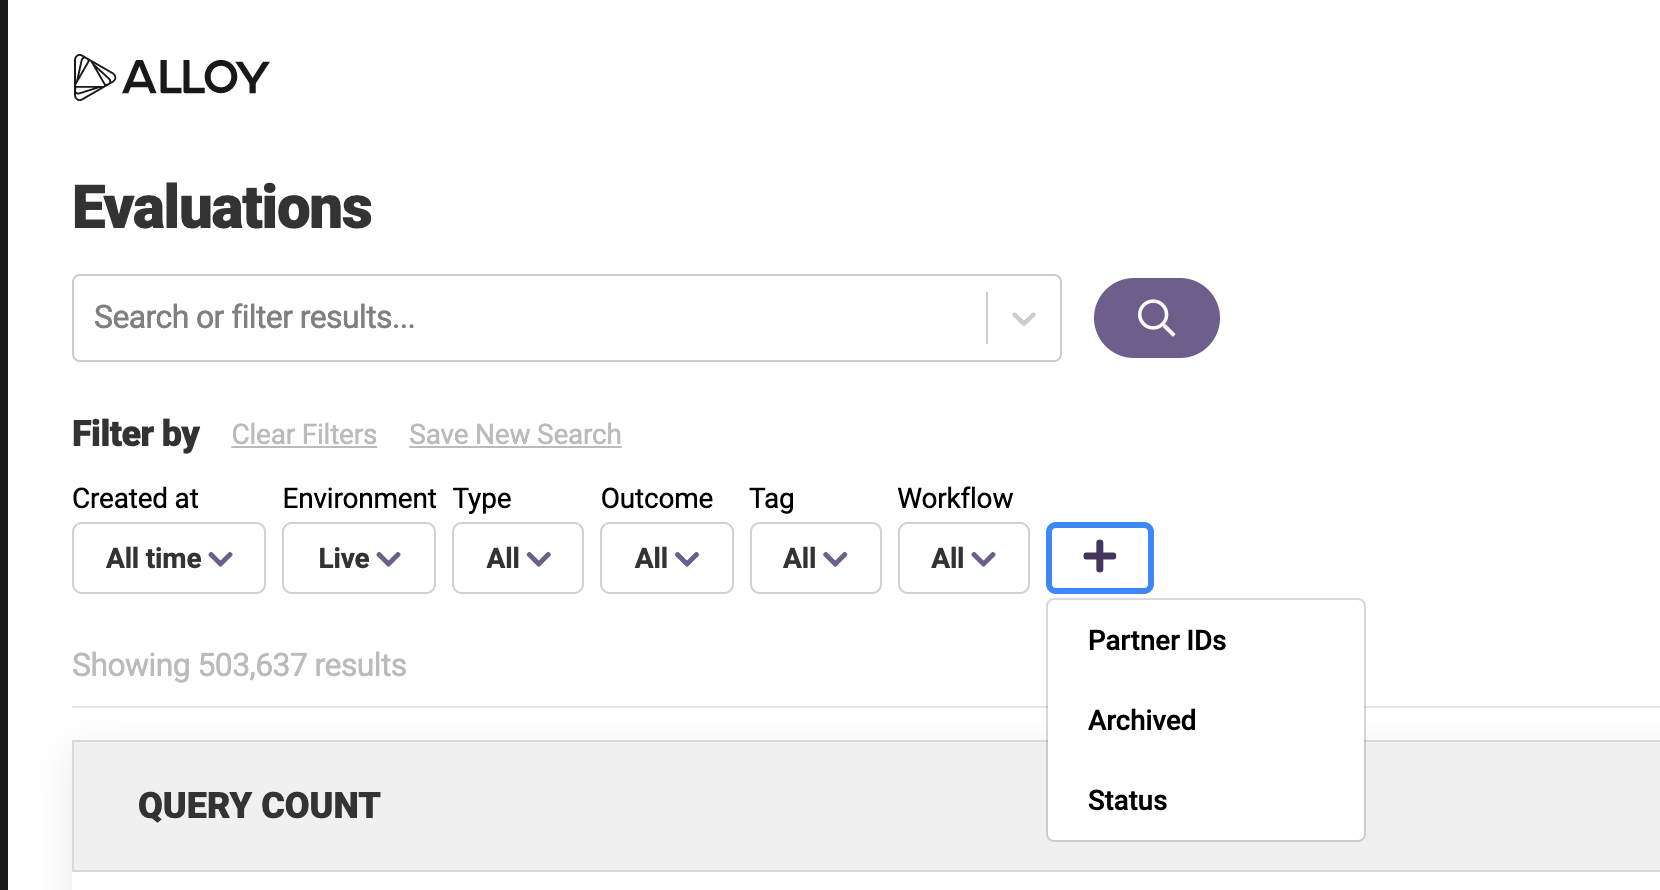
Product Updates

Ongoing watchlist monitoring now available

Alloy customers can now continuously monitor their customers for suspicious activity. To meet liability requirements, financial institutions must re-screen their entire client list every time a watch list is updated. Our new watch list monitoring workflow automates this by allowing clients to enroll their entities in continuous watch list monitoring during onboarding. By linking a recurring watch list workflow, Alloy will re-screen all enrolled entities every time a watch list is updated and create a new evaluation if there is a potential new hit.

Watchlist monitoring product image

Within the initial enrollment workflow, users must first associate the recurring watch list monitoring workflow.

Watchlist monitoring product image 2

Alloy creates a new evaluation every time there is a new hit on an updated watch list. These are housed on the entity profile page under the new Recurring tab.

Enhanced watchlist screening now available

In Evaluations, our new Watch List Matches panel allows analysts to clearly view all relevant information on any Entities that have received a hit from a watch list.

The panel shows all Entities that matched to a watch list, the reason, the source of the match and the confidence score.

Watchlist screening panel product image

From there, you can click on the source to expand the view and see more information on the match, allowing analysts to easily determine if this is a true match or a false positive.

Watchlist screening panel product image 2

Entity name in Group Entity Review modal

The Manual Review modal for an Entity now displays the name of the Entity for contextual reference.

Entity name

Quickly copy and paste matched data

We've made it faster for our users to copy and paste matched data from an evaluation. Hover over the Name, Address, Email, Phone, Birth Date or SSN and copy to clipboard.

Copy and paste screenshot

Assign user role upon agent creation

Quickly assign an existing role permission to a new agent upon creation.

Assign user role 1

You can always modify role permissions post creation by clicking into a specific agent as previously supported.

Assign user role 2


Group detail view now mimics group review view

The Group Detail view has been updated to be consistent with that of the current Group Review view. The difference between the two views is the ability to take action and review when accessing a group through the Review Queue.

Before Group Detail View

Group detail view

After Group Detail View

Group detail view 2


Core PII always appears in matched data

Determine when core PII was used in the evaluation but not verified or unverified by a third party service. Previously, we only showed a default string that represented none were matched. Now, you’ll see each section split out within matched data.

Before

Matched data screenshot 1

After

Matched data screenshot 2

Default user roles to saved searches

Make it easy for your users to access the information that is most relevant to them. Upon load, they will simply land on Evaluations, Entities and Review Queue with a saved search preselected for their role.

Default user roles image 1

Create a Public Saved Search To create a saved search that can be assigned to a role, you must first filter or search within Evaluations, Entities and Review Queue. Next, click on Save New Search, a modal will appear with the option to check Public View. Once checked, make sure to Save.

Default user roles image 2

Assign Public Saved Searches to a Role Account admins can then assign these public saved searches for each role permission within Roles Settings.

Default user roles image 3

Once you've created a public saved search and assigned it to a role, your users will now land on their respective default saved search.


Back