New Features

Pass outcome reason tags between workflows in a Journey

Outcome Reason tags can now be passed from one workflow to another in a Journey. This enables Alloy to handle state management on the client’s behalf, even in a complex Journey. For example, if there are two instances where you might run document verification in a Journey, using an Outcome Reason tells Alloy whether document verification has already been called and prevents it from being triggered again, to ensure the customer is not asked to complete it twice.

When an Outcome Reason is passed into a downstream workflow, it is called an “imported” value in that workflow. This imported tag can be used in this subsequent workflow (of any type) in the same way as a normal tag. It can also be used in the new “Router”-type workflow, now available as part of this release, to determine what to do next in the Journey. The most common way of doing this in the new Router-type workflow would be to connect the imported value to different outcomes which represent the different paths your Journey could take from that point.

To pass an Outcome Reason tag from one workflow to another, clients using Journeys need to first make a tag into an Outcome Reason in the “Settings” section of the dashboard. In the workflow they wish to import into, they would then click “Import Outcome Reason” in the top right menu of the workflow builder, selecting the Outcome Reason they wish to import.

To learn more about Journeys, view our documentation. If you’d like to try Journeys or start passing Outcome Reasons in your Journey, reach out to your SA, CSM, or [email protected].

New SDK powers the future of custom step-up verification

Alloy clients can now use Alloy's future-proofed SDK to support step-up verification. Clients using the updated SDK will be able to leverage the services of new fraud vendors as quickly as their business requires. Clients only need to integrate the SDK once, and then can make changes to their plugins without having to touch the SDK initialization code. The new SDK also supports Document Verification for Multi-Entity Applications. Instructions for setting up the SDK and more on Multi-Entity Support can be found here.

View alert details in Case Management

Transaction Monitoring clients can now review the exact activity triggering alerts in Case Management to streamline the review and resolution of cases. Within the case details page, analysts can double click the Alerts tab to view detailed information about the rule and the specific event(s) (e.g. transactions or account level activity) setting off the alert in a pop up.

Depending on the rules, case alert details may include:

  • Date of event

  • Event/transaction description

  • Transaction type

  • Transaction amount

  • Email address, phone number

  • Account balance


Clients will be able to view alert details for the following types of rules:

  • Transaction History
    • Monetary

    • Non-monetary

    • Counterparty

  • Account History
    • PII snapshots

    • Balances.

Ten new document types added to Alloy's Document Verification SDK

Alloy's Document Verification software development kit (SDK) has expanded to include ten new document types. A variety of income document verifications (see below) are now available to better support credit underwriting and Canadian dual authentication. Additionally, provincial and indigenous identity documents are now supported for onboarding Canadian applicants. Clients currently using the web SDK don't need to make any changes or download any new files—they can simply start using the new functionality.

The Following documents are now fully supported within Alloy's Document Verification SDK:

Identity documents:

  • License (USA, UK and Canada)

  • Passport

  • Canada Provincial ID

  • Canada Indigenous Card

Proof of income/tax documents:

  • Paystub

  • Bank Statement

  • W-2

  • 1099

  • 1120

  • 1065

  • T1 (Canadian tax doc)

  • T4 (Canadian tax doc)

To enable additional document types within the Alloy SDK, follow the steps below:

  1. Set up document verification workflow(s) with relevant services

  2. In your Journey, add a “DocV” node for each document type you want to collect. For example, a node for license OR passport and then a second node for paystub OR bank statement.

  3. Download the Alloy SDK by running yarn add @alloyidentity/web-sdk. Further instructions are available for web, iOS, and Android.

  4. In the initialization parameters, each journey node requires its own nested array. For example, if you wanted to collect a license OR passport AND a bank statement OR paystub, you would write: documents: [['license','passport'],['bank_statement','paystub']].

Once configured, your users can choose document types from the options you’ve selected, whether on web, iOS, or Android.


To learn more about the Alloy Document Verification SDK, view our documentation. If you'd like to add Alloy’s Document Verification SDK to your Alloy workflow, reach out to your CSM or [email protected] to learn more.

Access help content and submit a support ticket directly from the dashboard

A new "Contact Support" widget has been added to the lower left corner of the Alloy dashboard, giving all clients the option to access help articles and submit a support ticket directly from the dashboard.

Clicking on the widget will give users the option to ask a question and see relevant articles. If they need additional help, they can submit a ticket to the Alloy support team from within the widget.

Applications can now be assigned to agents

Agents can now assign applications to themselves and other agents from the Application Queue. This will prevent duplication of work between multiple agents and provide an audit trail of reviewer history. All clients using Journeys and the Application Queue will now see the new ‘Assign’ drop-down option on the right side of the application view.

  1. The ‘Review’ button will remain disabled until an agent has been assigned.
  2. Once users click on the ‘Assign’ button, a list of all applicable agents will be displayed for the user to select from.
  3. Based on the permissions that are configured, admins will be able to assign applications to themselves and other agents. Agents will only be able to assign to themselves. Please note that for existing clients, these permissions will have to be manually configured for the different roles. For clients who start using Alloy after today, these permissions will be set up for them by default.
  4. Once an agent has been assigned, their name will appear in the button and replace the ‘Assign’ text. The ‘Review’ button will be enabled once an agent is assigned. Agents can un-assign themselves from an application by clicking the 'x' to the right of their name.

Note: In the small edge case where more than one user is assigned to an application at the same time, we will assign it to the first agent and display an error message to the rest.

Applications with multiple entities now supported in Application Queue

For clients using Journeys, applications that include multiple entities applying together are now supported within the Application Queue. This includes use cases that involves multiple applications for joint applications as well as business applications. Agents can now see applications that include multiple entities within a unified view and no longer have to toggle between multiple views in order to review each entity within an application. Both evaluation and journey application reviews can be handled from the same screen.

This functionality replaces our Groups feature in a more unified and user-friendly way. To view multi-entity applications within the Application Queue, clients must be integrated with Journeys and use the new “entities array” api schema. View our documentation for additional details.

If you’d like to try Journeys, reach out to your CSM or [email protected] to learn more.

Webhooks dashboard now available

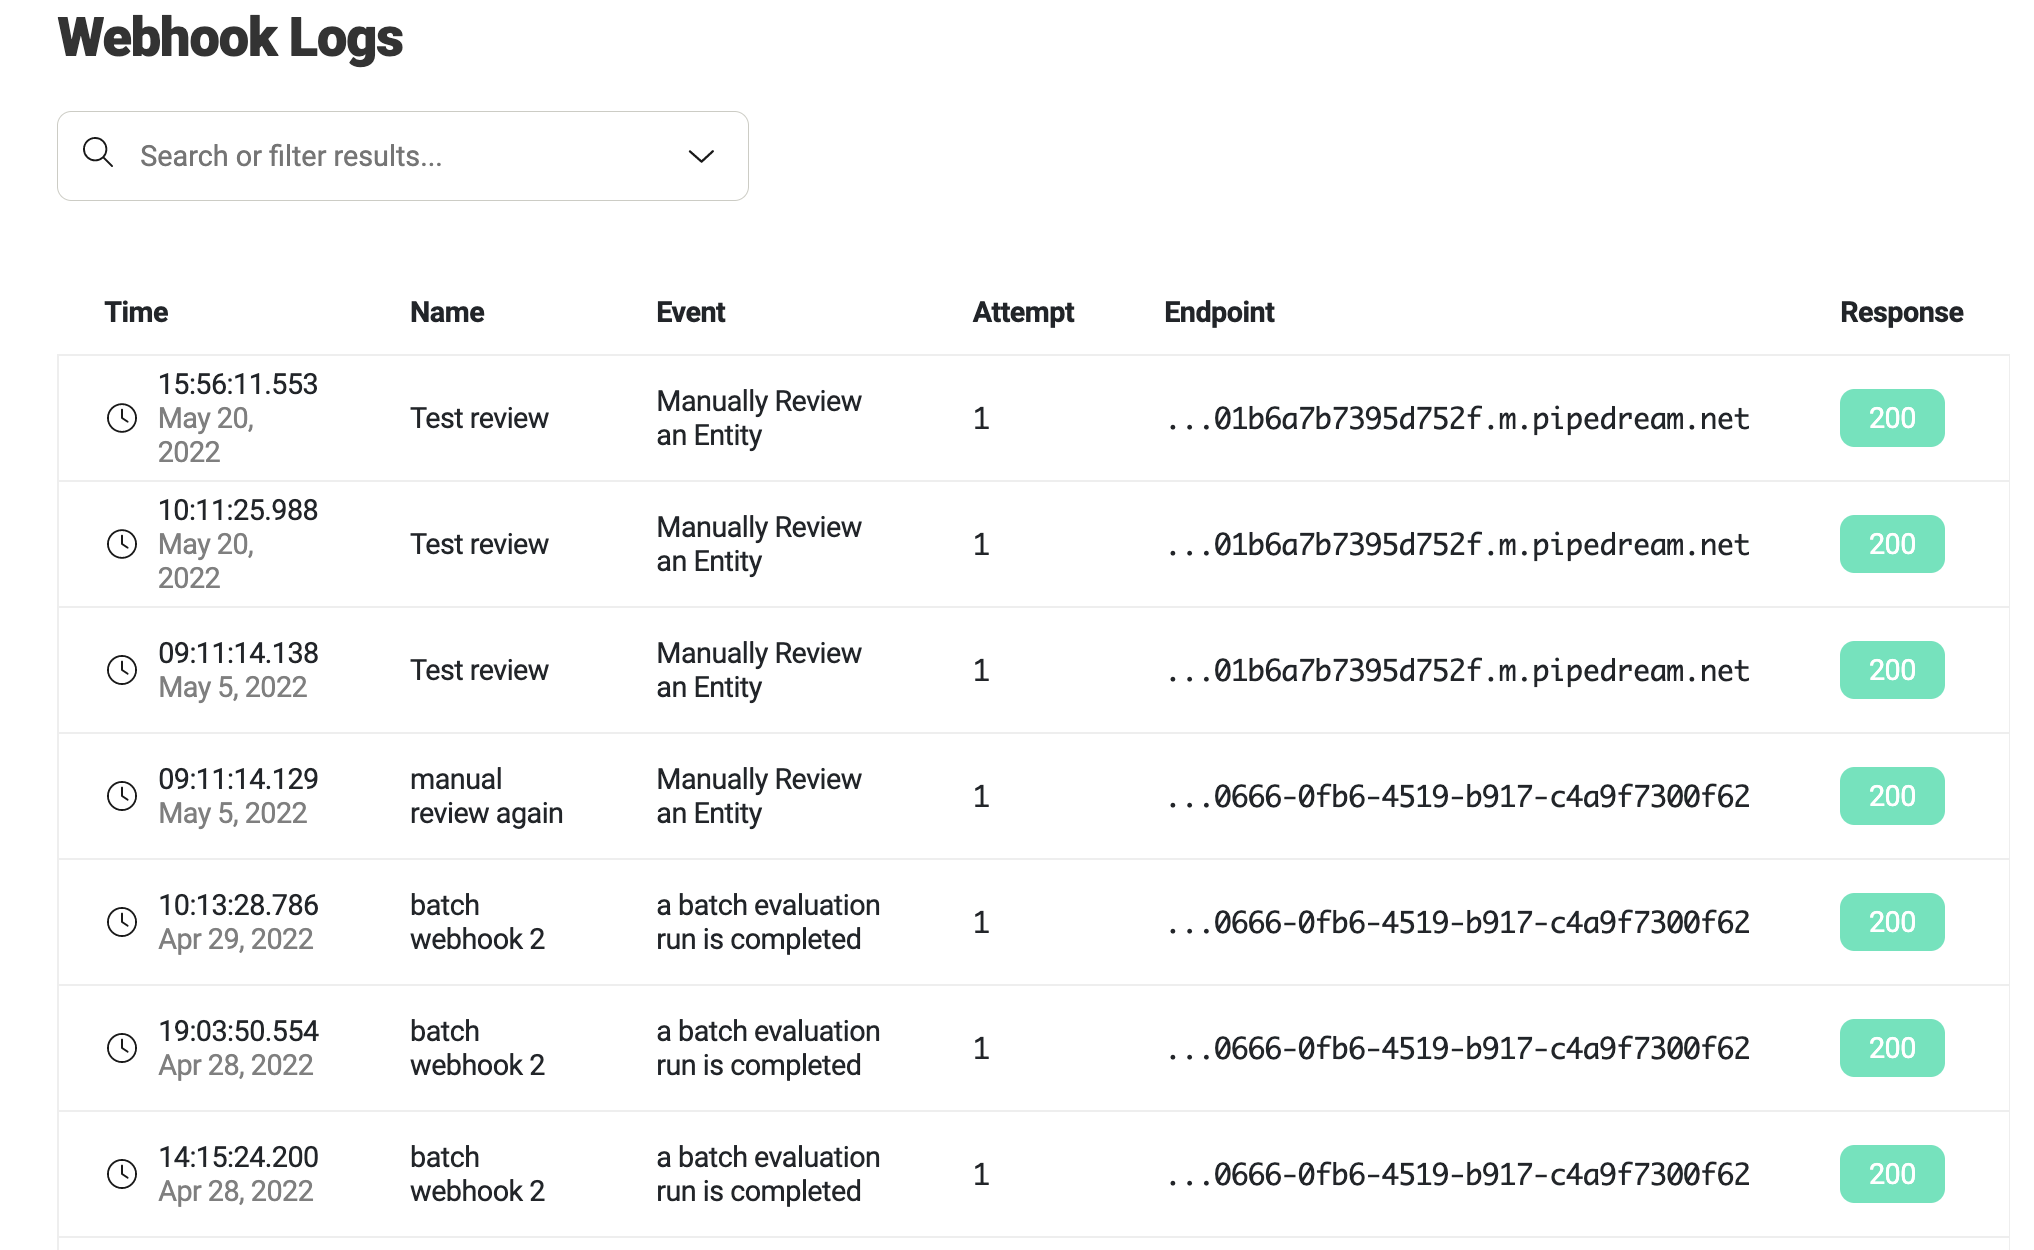
A log of Alloy’s outgoing webhooks is now available within the Settings menu of the Alloy dashboard, under "Webhook Logs."

Webhook Logs

You can filter/search by any column, free type search or search for anything contained in the webhook payload, for example, a specific entity token. You can also see the attempt number; Alloy will attempt to send all webhooks up to 10 times with exponential backoff. Click on a specific log to see more details, including all previous attempts for a webhook.

Back